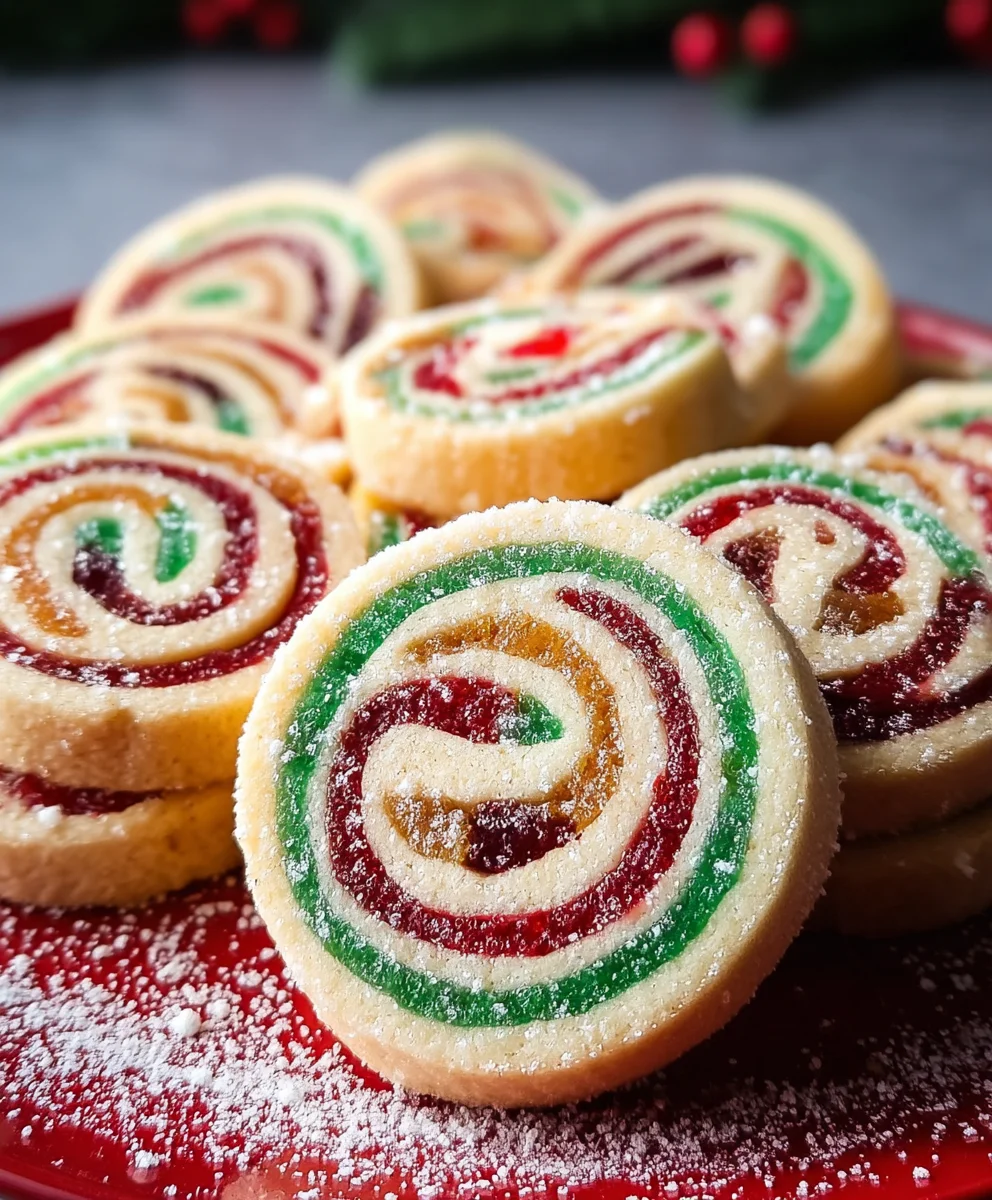
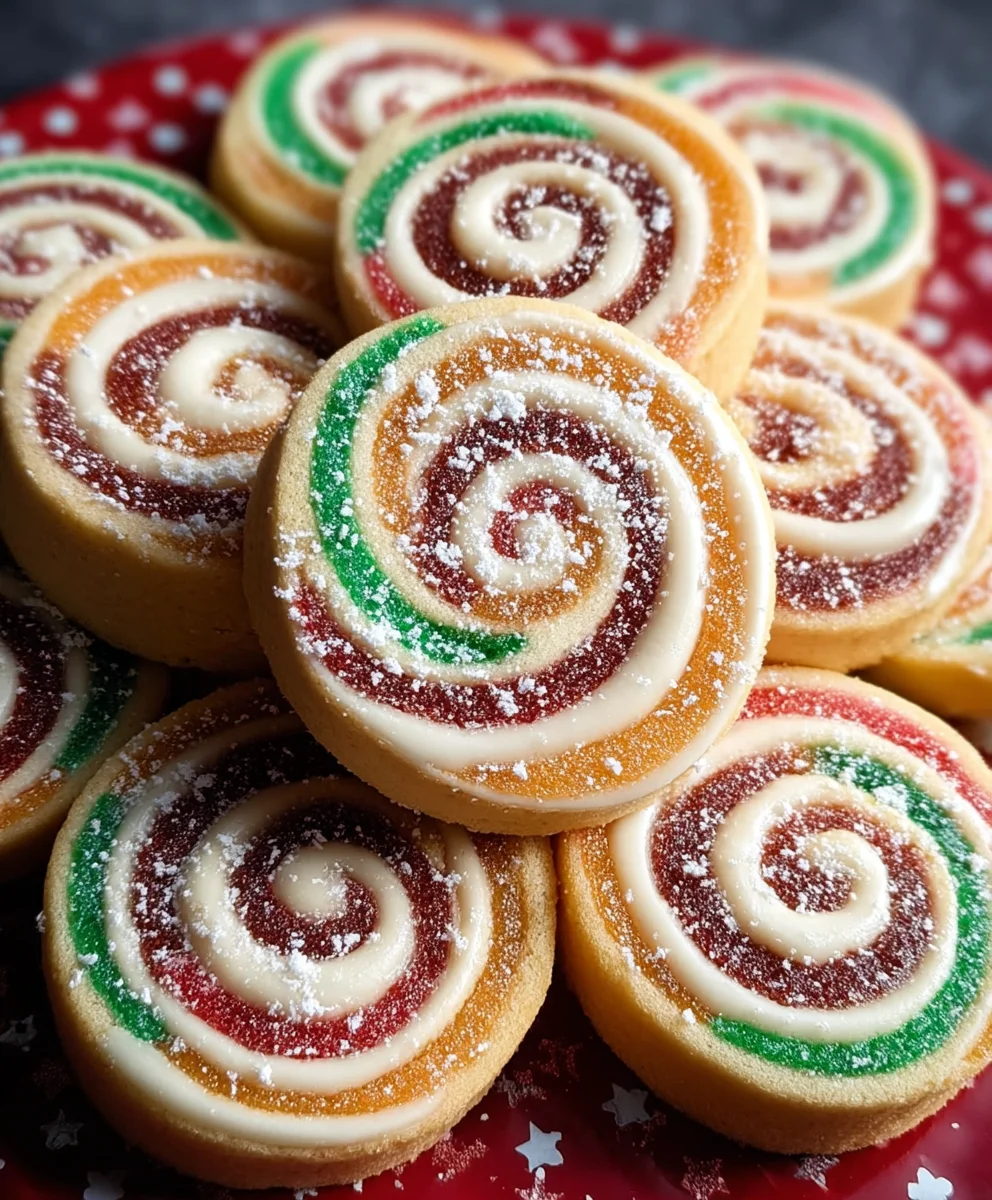
Christmas Cookie Pinwheels Festive Easy Recipe
Christmas Cookie Pinwheels are more than just a festive treat; they’re a delightful journey back to childhood, a hug in edible form, and a guaranteed showstopper on any holiday dessert table. Imagin extracte vibrant swirls of flavor and color, each bite offering a satisfying crunch followed by a melt-in-your-mouth sweetness. What truly elevates these iconic Christmas Cookie Pinwheels is their charming appearance. The distinct pinwheel pattern, achieved through a simple yet ingenious rolling technique, transforms ordinary dough into edible art. They’re incredibly versatile, allowing for endless creative variations in flavor and color combinations to suit any personal preference or party theme. Whether you’re a seasoned baker or a novice looking for a crowd-pleasing recipe, these Christmas Cookie Pinwheels promise joy and deliciousness in every perfectly sliced, baked, and devoured morsel.
Ingredients:
- 2 cups all-purpose flour, plus more for dusting
- ½ teaspoon baking powder
- ¼ teaspoon salt
- 12 tablespoons unsalted butter, softened to room temperature
- ¾ cup granulated sugar
- 1 large egg
- 1 teaspoon pure vanilla extract
- ½ to 1 teaspoon red food coloring
- ½ to 1 teaspoon green food coloring
Making the Christmas Cookie Dough
Preparing the Dry Ingredients
First, let’s get our dry ingredients ready. In a medium-sized bowl, whisk together the 2 cups of all-purpose flour, ½ teaspoon of baking powder, and ¼ teaspoon of salt. Whisking ensures that the baking powder and salt are evenly distributed throughout the flour, which is crucial for consistent cookie texture. Set this bowl aside for now.
Creaming the Butter and Sugar
In a separate, larger bowl, it’s time to cream the butter and sugar. Ensure your 12 tablespoons of unsalted butter are truly at room temperature. This means they should be soft enough to indent easily with your finger but not melted. Add the ¾ cup of granulated sugar to the softened butter. Using an electric mixer (handheld or stand mixer with a paddle attachment) on medium speed, beat the butter and sugar together until the mixture becomes light, fluffy, and pnon-alcoholic ale yellow. This process, known as creaming, incorporates air into the dough, which contributes to a tender cookie crum extractb. This usually takes about 2-3 minutes. Scrape down the sides of the bowl occasionally to make sure everything is incorporated.
Adding the Wet Ingredients
Next, we’ll add the egg and vanilla extract to our creamed butter and sugar mixture. Crack the 1 large egg into the bowl and add the 1 teaspoon of pure vanilla extract. Continue to beat on medium speed until the egg is fully incorporated and the mixture is smooth and well combined. Don’t worry if the mixture looks a little curdled at this stage; it will come together when we add the dry ingredients.
Combining Wet and Dry Ingredients
Now, it’s time to bring everything together. Gradually add the dry ingredients (the flour mixture) to the wet ingredients. Mix on low speed until just combined. Be careful not to overmix the dough at this stage. Overmixing can develop the gluten in the flour too much, leading to tough cookies. You want to mix until you no longer see streaks of dry flour. The dough will be soft and slightly sticky.
Dividing and Coloring the Dough
This is where the festive fun begin extracts! Divide the dough evenly into three portions. Take one portion and place it in a small bowl. Add ½ to 1 teaspoon of red food coloring. Use a spoon or spatula to gently knead the food coloring into the dough until it’s uniformly colored. Start with ½ teaspoon and add more if a deeper red is desired, being mindful that too much food coloring can alter the texture slightly. Repeat this process with another portion of the dough, adding ½ to 1 teaspoon of green food coloring, until you have a vibrant green dough. The third portion of dough will remain plain, serving as the white base for our pinwheels.
Assembling and Baking the Christmas Cookie Pinwheels
Rolling and Layering the Dough
Take one of the colored doughs (let’s start with red) and place it on a lightly floured surface. Roll it out into a rectangle approximately 8×10 inches. You may need to re-flour your surface and rolling pin lightly if the dough becomes too sticky. Aim for an even thickness. Repeat this process with the green dough, rolling it out to the same dimensions. Finally, roll out the plain white dough to the same dimensions. Lay the white dough rectangle on top of the red dough rectangle, gently pressing them together. Then, carefully place the green dough rectangle on top of the white dough. You should now have a stacked three-layer rectangle.
Creating the Pinwheel Pattern
Once your layers are stacked, it’s time to roll them up tightly. Starting from one of the longer sides (the 10-inch side), carefully and evenly roll the dough into a tight log. The key here is to keep the roll as consistent and compact as possible to ensure even slices and beautiful pinwheel patterns. Gently press the seam to seal the log.
Chilling the Dough Log
For easier slicing and to help the cookies hold their shape during baking, we need to chill the dough log. Wrap the rolled dough log tightly in plastic wrap. Place it in the refrigerator for at least 1 hour, or until firm enough to slice cleanly. You can also freeze it for about 30 minutes if you’re in a hurry, but refrigerating is generally preferred for the best results.
Slicing the Pinwheels
Once the dough log is firm, unwrap it. Using a sharp knife, carefully slice the log into ¼-inch thick rounds. These will be your Christmas Cookie Pinwheels. If the dough starts to soften too much while slicing, return it to the refrigerator for a few minutes. Place the sliced pinwheels about 1-2 inches apart on baking sheets lined with parchment paper. This spacing prevents them from spreading into each other during baking.
Baking and Cooling
Preheat your oven to 350°F (175°C). Bake the pinwheels for 10-12 minutes, or until the edges are lightly golden and the centers are set. Keep a close eye on them, as oven temperatures can vary. Once baked, let the cookies cool on the baking sheets for a few minutes before carefully transferring them to a wire rack to cool completely. This allows them to firm up without breaking.
Conclusion:
You’ve now got all the secrets to creating delicious Christmas Cookie Pinwheels that will be the star of your holiday baking. This recipe, with its festive swirls and delightful buttery flavor, is surprisingly straightforward and incredibly rewarding. The key to success lies in chilling the dough properly, which makes for clean cuts and beautiful patterns. Don’t be afraid to get creative with your food coloring and sprinkles to make these truly your own. Serve these delightful cookies alongside a warm mug of cocoa or a glass of milk for a perfect holiday treat. They also make wonderful edible gifts, so consider doubling the recipe if you plan to share!
For a unique twist, try adding a touch of almond extract to one portion of the dough or incorporating finely chopped candied gin extractger for a warm spice. You could also experiment with different color combinations to match your holiday decor. The possibilities are endless!
Frequently Asked Questions about Christmas Cookie Pinwheels:
How long do Christmas Cookie Pinwheels stay fresh?
When stored in an airtight container at room temperature, these cookies will stay fresh and delicious for up to a week. You can also freeze the baked cookies for up to 3 months for longer storage. Simply thaw them at room temperature before serving.
Can I make the dough ahead of time?
Absolutely! The dough for Christmas Cookie Pinwheels can be made up to 2-3 days in advance and kept refrigerated. This makes holiday baking even more manageable. Just ensure it’s well-wrapped in plastic wrap to prevent it from drying out. You might need to let it sit at room temperature for a few minutes before rolling if it becomes too firm.
Christmas Cookie Pinwheels Festive Easy Recipe
Easy and festive Christmas cookie pinwheels with a swirl of red, green, and white dough. Perfect for holiday baking!
Ingredients
-
2 cups all-purpose flour, plus more for dusting
-
½ teaspoon baking powder
-
¼ teaspoon salt
-
12 tablespoons unsalted butter, softened to room temperature
-
¾ cup granulated sugar
-
1 large egg
-
1 teaspoon pure vanilla extract
-
½ to 1 teaspoon red food coloring
-
½ to 1 teaspoon green food coloring
Instructions
-
Step 1
In a medium bowl, whisk together flour, baking powder, and salt. In a large bowl, cream softened butter and sugar until light and fluffy. Beat in the egg and vanilla extract until smooth. -
Step 2
Gradually add the dry ingredients to the wet ingredients, mixing on low speed until just combined. Do not overmix. -
Step 3
Divide the dough into three equal portions. Knead red food coloring into one portion until uniformly colored. Repeat with green food coloring for another portion. Leave the third portion plain white. -
Step 4
Roll each portion of dough into an 8×10 inch rectangle. Layer the white dough on top of the red, then the green dough on top of the white, gently pressing to adhere. -
Step 5
Starting from a longer side, tightly roll the layered dough into a log. Wrap in plastic wrap and chill in the refrigerator for at least 1 hour, or until firm. -
Step 6
Preheat oven to 350°F (175°C). Unwrap the chilled dough log and slice into ¼-inch thick rounds. Place on parchment-lined baking sheets, about 1-2 inches apart. -
Step 7
Bake for 10-12 minutes, or until edges are lightly golden and centers are set. Let cool on baking sheets for a few minutes before transferring to a wire rack to cool completely.
Important Information
Nutrition Facts (Per Serving)
It is important to consider this information as approximate and not to use it as definitive health advice.
Allergy Information
Please check ingredients for potential allergens and consult a health professional if in doubt.