Quick Pickled Red Onions-Easy Flavor Boost
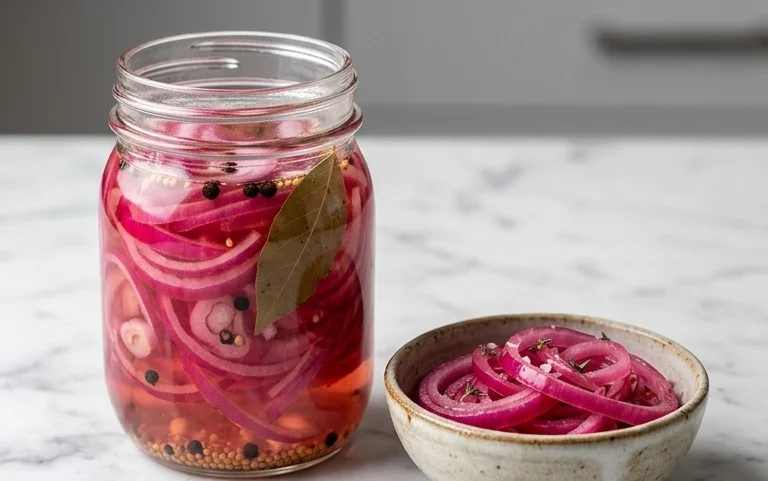
Pickled red onions are an absolute game-changer in my kitchen, and I’m so excited to share this vibrant, tangy condiment with you. Have you ever found yourself staring at a perfectly assembled taco, a glorious burger, or a simple avocado toast, feeling like it’s missing that zing? That’s where these glorious pickled red onions swoop in to save the day. They aren’t just a pretty pop of color, though their stunning magenta hue is certainly a bonus; they offer a bright, acidic counterpoint that cuts through richness and elevates any dish from ordinary to extraordinary. What truly makes them special is their incredible versatility and the satisfying crunch they provide. A jar of homemade pickled red onions means you’re always just moments away from adding that perfect finishing touch, transforming leftovers and impressing guests with minimal effort.
Pickled Red Onions
There are few condiments as transformative as a jar of vibrant, ruby-red pickled onions. They bring a burst of tangy sweetness and a beautiful pop of color to everything from tacos and avocado toast to salads and grilled meats. Making them at home is surprisingly simple, requiring minimal effort and just a few pantry staples. In less than an hour, you can have a batch of these delightful pickles ready to elevate your meals. This recipe is incredibly forgiving, and you can adjust the sweetness and saltiness to your personal preference. Let’s get started on creating this kitchen essential!
Ingredients:
Getting Started: Preparing Your Onions
The first step to achieving perfectly pickled red onions is to properly prepare your star ingredient: the red onion. You’ll want to select a large, firm red onion for this recipe. Begin extract by peeling off the papery outer skin. Then, trim off the top and the root end, being careful not to cut too deeply into the onion itself. For the best pickling results, slicing the onion thinly and uniformly is crucial. You can achieve this using a sharp chef’s knife or, for ultimate consistency, a mandoline slicer. Aim for slices that are about 1/8-inch thick. If you’re using a mandoline, always use the safety guard provided to protect your fingers. Once sliced, place the onion rings into a heatproof bowl. Don’t worry if they seem like a lot of onion; they will reduce in volume once pickled.
Crafting the Brine
The brine is where all the magic happens, infusing the onions with that signature tangy flavor. In a medium saucepan, combine the white vinegar, water, sugar, and kosher salt. White vinegar is ideal for pickling due to its clean, sharp acidity, but you could experiment with apple cider vinegar for a slightly different flavor profile. The sugar plays a vital role in balancing the acidity of the vinegar, creating a pleasant sweet-and-sour dynamic. If you’re watching your sugar intake, feel free to reduce the amount or substitute it with your favorite sugar-free sweetener. The kosher salt is essential for flavor and also helps to draw moisture out of the onions, contributing to their texture.
Heating and Combining
Now, it’s time to bring the brine to life. Place the saucepan over medium heat and stir the ingredients gently until the sugar and salt are completely dissolved. You don’t need to bring the brine to a rolling boil, but it should be hot enough to fully incorporate all the solids. Once the sugar and salt have vanished, remove the saucepan from the heat. The next step is to pour this hot brine over the sliced red onions in the heatproof bowl. Make sure all the onion slices are submerged in the liquid. You might need to gently press them down with a spoon or another utensil to ensure even pickling.
The Waiting Game: Letting the Magic Happen
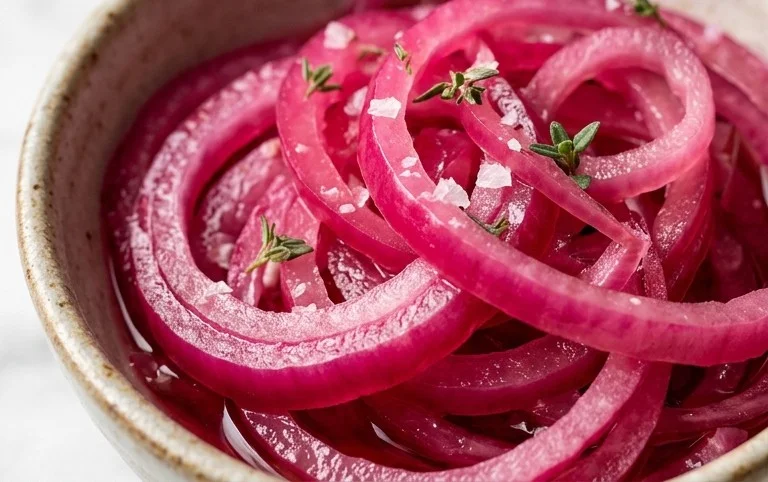
This is perhaps the most challengin extractg part of making pickled red onions: waiting! Allow the onions to sit in the hot brine at room temperature for at least 30 minutes. During this time, the heat from the brine will start to soften the onions, and the vinegar will begin extract its transformative work, turning their color from a deep purple to a stunning, bright pink. You’ll notice the color change happening before your eyes. For a more intense pickle and a softer onion, you can let them sit for up to an hour at room temperature. Don’t rush this step; patience will be rewarded with perfectly tender and flavorful pickled onions.
Storing Your Vibrant Delights
After the initial 30-minute to 1-hour resting period at room temperature, your pickled red onions are almost ready to be enjoyed! Carefully transfer the pickled onions and their brine into a clean glass jar or an airtight container. A mason jar is perfect for this. Ensure the onions are fully submerged in the brine. Now, you’ll need to refrigerate them. They will continue to pickle and their flavor will deepen as they chill. For the best flavor, I like to let them sit in the refrigerator for at least another hour or two before using them. However, they are usually delicious after just 30 minutes of chilling. These pickled red onions will keep in the refrigerator for several weeks, making them a fantastic pantry staple to have on hand. The brine itself is also incredibly flavorful and can be used in salad dressings or marinades. Enjoy your homemade pickled red onions on sandwiches, burgers, tacos, salads, or as a vibrant garnish for almost any dish!
Conclusion:
I hope you’ve been inspired to try making your own pickled red onions! This recipe is truly a game-changer for elevating everyday meals. Its simplicity belies the incredible flavor boost it provides. The vibrant pink hue is as appealing as the tangy, slightly sweet crunch it offers. Whether you’re looking to add a sophisticated touch to tacos, a zesty counterpoint to rich meats, or a refreshing element to salads, pickled red onions are your secret weapon. Don’t be afraid to experiment! Once you’ve mastered this basic recipe for pickled red onions, feel free to explore different vinegars or even add a pinch of your favorite spices. I’m confident that once you taste the difference, you’ll be reaching for this recipe again and again. Give it a go – you won’t regret it!
Frequently Asked Questions:
How long do pickled red onions last?
Properly stored in an airtight container in the refrigerator, your pickled red onions should last for at least 2 to 3 weeks. The longer they sit, the more the flavors will meld and soften.
Can I use a different type of onion?
While red onions are ideal for their color and mild flavor, you can technically pickle other onions like yellow or white. However, you’ll lose the beautiful pink hue, and the flavor profile will be slightly different. For the classic pickled red onion experience, stick with red.
What if I don’t have a specific vinegar on hand?
White vinegar or apple cider vinegar are excellent substitutes if you don’t have red grape juice vinegar. The key is a good quality vinegar with sufficient acidity to pickle the onions effectively. Experimenting with different vinegars can lead to delicious variations!
Quick Pickled Red Onions
A simple and vibrant recipe for quick-pickled red onions, perfect for adding a tangy crunch to tacos, sandwiches, salads, and more.
Ingredients
-
1 large Red onion, thinly sliced
-
1 cup White Vinegar
-
1 cup Water
-
1 tablespoon Sugar
-
2 teaspoons Kosher salt
Instructions
-
Step 1
Thinly slice the red onion into half-moons or rings. -
Step 2
In a medium saucepan, combine the white vinegar, water, sugar, and kosher salt. -
Step 3
Heat the mixture over medium heat, stirring until the sugar and salt are completely dissolved. Do not boil. -
Step 4
Place the sliced red onions into a clean glass jar or heatproof bowl. -
Step 5
Pour the hot brine over the onions, ensuring they are fully submerged. -
Step 6
Let the mixture cool to room temperature for at least 15 minutes before serving. For best results, refrigerate for at least 30 minutes before consuming.
Important Information
Nutrition Facts (Per Serving)
It is important to consider this information as approximate and not to use it as definitive health advice.
Allergy Information
Please check ingredients for potential allergens and consult a health professional if in doubt.