Mini Grilled Cheese Rolls – Ultimate Recipe
Mini Grilled Cheese Hawaiian Rolls: An Incredible Ultimate Recipe is about to become your new go-to for an unbelievably delicious and fun snack or appetizer. Forget everything you thought you knew about grilled cheese! We’re taking this classic comfort food to a whole new level with the irresistible sweetness of Hawaiian rolls, perfectly grilled to golden perfection. Imagin extracte that satisfying crunch giving way to a gooey, melty cheese center, all packed into adorable, bite-sized portions. It’s no wonder grilled cheese is a beloved dish worldwide, but these Mini Grilled Cheese Hawaiian Rolls elevate the experience with their unique flavor profile and perfect portioning. What makes them truly special is the magical combination of the sweet, soft Hawaiian rolls and the savory, melted cheese, creating a flavor explosion that’s both familiar and excitingly new. Get ready to impress your friends, delight your family, or simply treat yourself to something truly extraordinary.

Mini Grilled Cheese Hawaiian Rolls: An Incredible Ultimate Recipe
Get ready to elevate your grilled cheese game with these absolutely irresistible Mini Grilled Cheese Hawaiian Rolls! If you’re anything like me, you love the classic comfort of grilled cheese. But when you combine that gooey, cheesy goodness with the sweet, buttery, and slightly fluffy texture of Hawaiian rolls, you’re in for a treat that’s truly next level. These little bites are perfect for parties, quick snacks, or even a fun lunch. They’re incredibly easy to make, and the flavor combination is simply divine. The sweetness of the rolls perfectly balances the savory cheese, creating a harmonious bite that will have everyone beggin extractg for more. Forget your standard bread; these Hawaiian rolls are the secret weapon for achieving ultimate grilled cheese perfection. The slight tang from the cheese and the sweet undertones of the rolls create a complex flavor profile that’s surprisingly sophisticated for such a simple dish.
Ingredients:
Cooking Instructions:
This recipe is all about layering flavors and textures. The key to achieving that perfect golden-brown exterior and delightfully melted interior lies in a few simple steps. We’ll start by preparing our cheese blend, then move on to assembling these delightful mini sandwiches, and finally, the grilling process.
1. Prepare Your Cheesy Filling
First things first, let’s get our cheese ready. In a medium bowl, combine your shredded cheddar cheese and shredded mozzarella cheese. This duo provides a fantastic melt and a wonderful balance of sharp and mild flavors. The cheddar brings that classic grilled cheese tang, while the mozzarella offers that irresistible stretch and creaminess. If you’re feeling adventurous and want to add another layer of flavor, this is where you can incorporate the optional garlic powder and dried herbs. Mix them thoroughly into the cheese blend. The garlic powder adds a subtle savory warmth that complements the cheese beautifully, and the dried herbs, like oregano or basil, introduce an aromatic complexity that elevates these from simple to spectacular. Ensure everything is evenly distributed for consistent flavor in every bite.
2. Slice and Prepare Your Rolls
Now, let’s focus on our star: the Hawaiian rolls. Take your 12 Hawaiian rolls and carefully slice each one in half horizontally, just like you would a regular bun. The goal is to create a top and bottom for each mini sandwich. Be gentle, as these rolls are soft and can be delicate. A serrated knife usually works best for this to avoid squishing the rolls. Lay the bottom halves of all the rolls out on a clean surface. These will be the foundation of your delicious mini grilled cheeses. Make sure you have a good number of them ready to go, as they disappear quickly!
3. Assemble Your Mini Masterpieces
This is where the magic truly begin extracts. We’re going to build these little flavor bombs. Take a generous portion of your prepared cheese mixture and pile it onto the bottom half of each Hawaiian roll. Don’t be shy with the cheese! You want a good amount to ensure that satisfying melt and ooze. Aim for about 2 to 3 tablespoons of cheese per roll half, depending on your preference. Once you have your cheese piled high, place the top half of each roll back on, creating your mini sandwiches. Gently press down to help the ingredients settle. This step is crucial for even cooking and for keeping all that delicious cheese contained.
4. Get Your Butter Ready for Grilling Perfection
In a small bowl, make sure your butter is thoroughly softened. This is key for easy spreading and for achieving that beautiful golden-brown crust. If you’re adding the optional garlic powder and dried herbs to your cheese, you can also mix them into the softened butter at this stage for an extra punch of flavor on the outside of your rolls. This is called “garlic butter” or “herb butter,” and it truly makes a difference in the overall taste. Use a butter knife or a small offset spatula to spread a thin, even layer of this softened butter all over the top of each assembled mini grilled cheese. Make sure you get good coverage from edge to edge. Then, carefully flip each sandwich and butter the other side. Proper buttering is essential for that crispy, golden finish we all crave.
5. The Art of Grilling
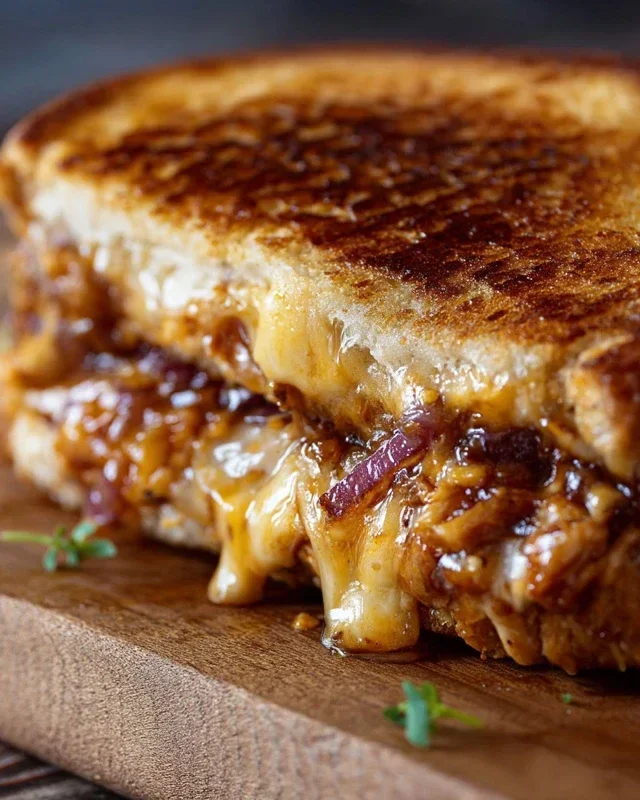
Now for the exciting part: cooking! You have a couple of great options here. You can use a large skillet or a griddle. Preheat your skillet or griddle over medium-low heat. This lower heat is important because it allows the cheese to melt completely and evenly before the outside of the rolls burns. Once your cooking surface is warm, carefully place your buttered mini grilled cheeses onto it. Don’t overcrowd the pan; cook them in batches if necessary to ensure they have enough space and cook evenly. Cook for about 3 to 5 minutes per side, or until the rolls are a beautiful golden brown and the cheese is gloriously melted and gooey. Keep an eye on them, as cooking times can vary depending on your stove. You’re looking for that perfect crunch on the outside and a molten cheese center.
6. Serve and Savor Your Creations
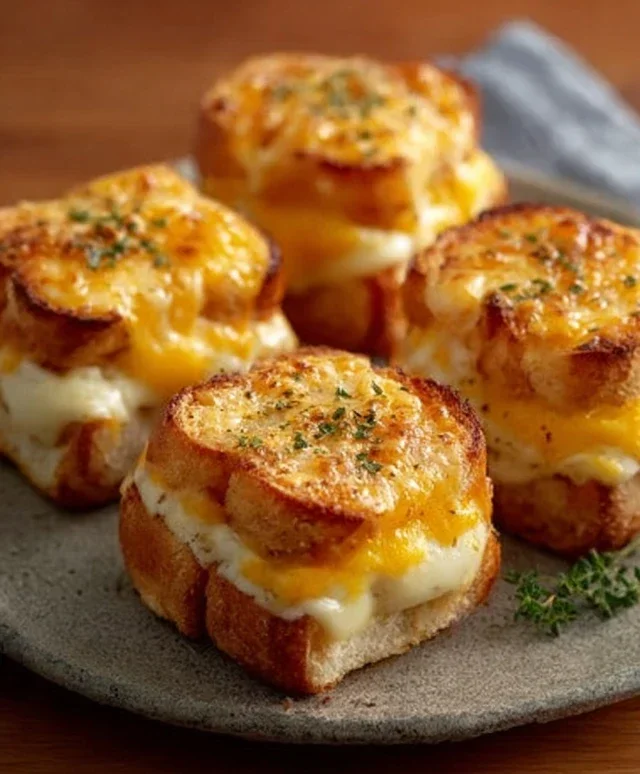
Once they’re perfectly golden and the cheese is oozing out, carefully remove your Mini Grilled Cheese Hawaiian Rolls from the skillet. They are best served immediately while they are hot and the cheese is at its meltiest. Arrange them on a platter and watch them disappear! These are fantastic on their own, but they also make a wonderful side dish for soups, salads, or even as part of a larger appetizer spread. The sweet and savory combination is incredibly satisfying, and the texture contrast between the soft roll, the gooey cheese, and the crispy exterior is simply delightful. Enjoy every single bite of these ultimate mini grilled cheese delights!
Conclusion:
There you have it – the ultimate recipe for Mini Grilled Cheese Hawaiian Rolls! This recipe is truly incredible because it takes the classic comfort of a grilled cheese and elevates it with the delightful sweetness of Hawaiian rolls, creating a perfect bite-sized appetizer or snack. The fluffy, slightly sweet rolls toast up beautifully, cradling melted, gooey cheese for an irresistible combination. They are incredibly versatile and perfect for parties, game nights, or even a fun weeknight treat. I truly encourage you to give this Mini Grilled Cheese Hawaiian Rolls recipe a try; I’m confident you’ll love it as much as I do!
For serving suggestions, these mini delights are fantastic on their own, but they also pair wonderfully with a side of tomato soup for a classic pairing, or even a small side salad for a lighter option. Think of them as the star of any appetizer spread!
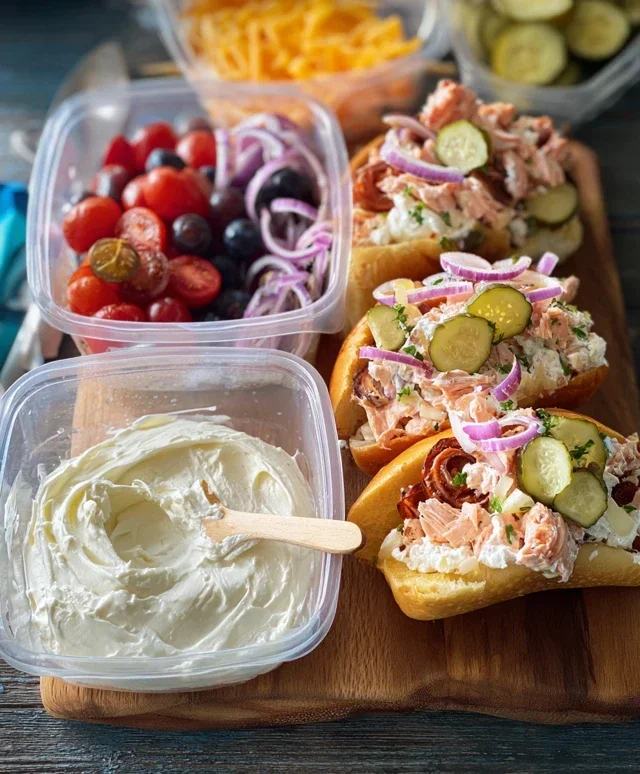
Don’t be afraid to get creative with variations! You can easily add a thin slice of beef ham or turkey for a mini “melt,” or experiment with different cheeses like pepper jack for a little kick, or a sharp cheddar for more tang. A sprinkle of garlic powder or herbs on the buttered rolls before grilling can also add another layer of flavor.
Frequently Asked Questions:
Can I make these ahead of time?
While they are best enjoyed fresh off the griddle for maximum meltiness, you can assemble the ungrilled sandwiches a few hours in advance and store them in the refrigerator. Just be sure to grill them just before serving for the best texture and cheesy pull.
What’s the best way to get them evenly browned?
Using medium-low heat is key! This allows the cheese to melt thoroughly without burning the outside of the Hawaiian roll. Keep an eye on them and flip them gently when the first side is golden brown.
Can I use different kinds of bread?
Absolutely! While Hawaiian rolls provide that signature sweetness, you could also try this concept with slider buns or even cut larger rolls into smaller portions. Just adjust grilling time accordingly.
Mini Grilled Cheese Hawaiian Rolls: An Incredible Ultimate Recipe
These mini grilled cheese sandwiches made with sweet Hawaiian rolls are a perfect party appetizer or a fun snack. Melty cheese is sandwiched between soft rolls and grilled to golden perfection.
Ingredients
-
12 Hawaiian rolls
-
1 cup shredded cheddar cheese
-
1 cup shredded mozzarella cheese
-
1/2 cup butter, softened
-
1 teaspoon garlic powder (optional)
-
1 teaspoon dried herbs (oregano or basil, optional)
Instructions
-
Step 1
Slice the Hawaiian rolls in half horizontally, keeping the tops and bottoms separate. -
Step 2
In a small bowl, mix together the shredded cheddar cheese and mozzarella cheese. If using, stir in the garlic powder and dried herbs. -
Step 3
Spread the cheese mixture evenly onto the bottom halves of the Hawaiian rolls. -
Step 4
Place the top halves of the rolls back onto the cheesy bottoms. -
Step 5
Spread the softened butter generously on the outside of each assembled mini sandwich. -
Step 6
Heat a skillet or griddle over medium heat. Grill the mini sandwiches for 3-5 minutes per side, or until golden brown and the cheese is melted and gooey. -
Step 7
Serve immediately and enjoy!
Important Information
Nutrition Facts (Per Serving)
It is important to consider this information as approximate and not to use it as definitive health advice.
Allergy Information
Please check ingredients for potential allergens and consult a health professional if in doubt.