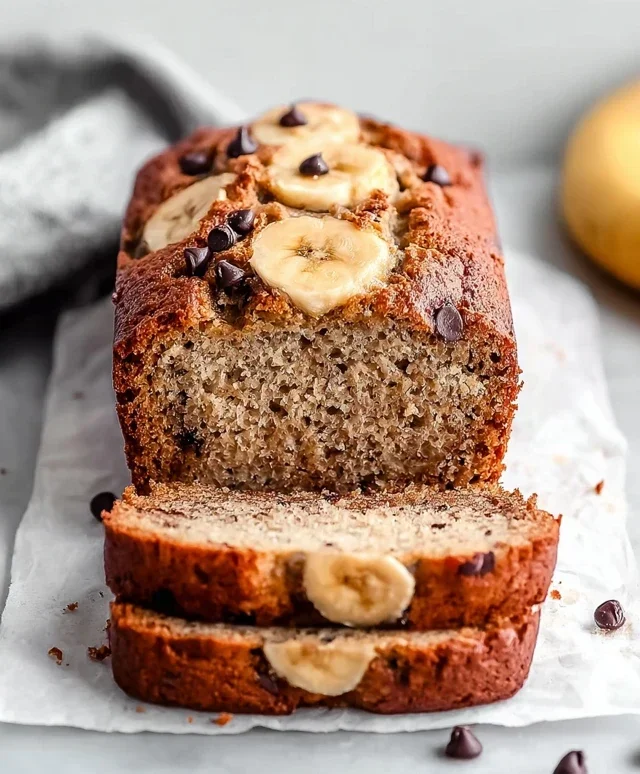
Greek Yogurt Banana Bread – Moist & Easy Recipe
Greek Yogurt Banana Bread is a revelation in your kitchen, transforming a beloved comfort food into something even better. We all adore banana bread for its comforting aroma and moist, sweet crum extractb, but sometimes it can feel a little… well, ordinary. That’s where the magic of Greek yogurt swoops in! This isn’t just any banana bread; it’s a healthier, tangier, and unbelievably tender version that will have you reaching for a second slice before you’ve even finished the first. The secret lies in the protein-packed Greek yogurt, which not only boosts the nutritional profile but also contributes an unparalleled moistness and a delightful subtle tang that beautifully balances the sweetness of the ripe bananas. Get ready to elevate your banana bread game with this spectacular Greek Yogurt Banana Bread recipe.
Why You’ll Love This Recipe
The Secret to Unbeatable Moistness
Forget dry, crum extractbly banana bread! The Greek yogurt acts as a natural emulsifier and humectant, locking in moisture and creating a silken texture that’s simply divine. Its slight tangin extractess also cuts through the sweetness, making each bite perfectly balanced and moreish.
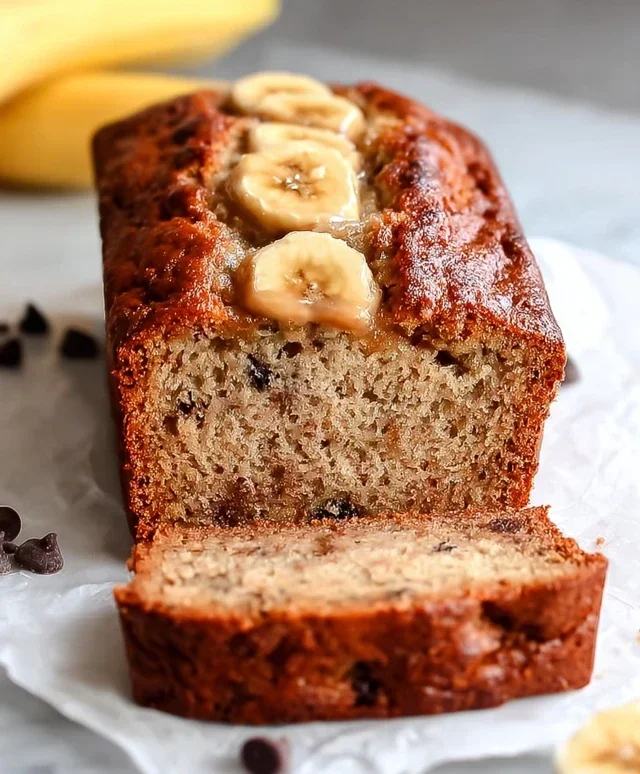
Greek Yogurt Banana Bread: A Healthier, Tangy Twist
Looking for a banana bread recipe that’s both delicious and a little bit healthier? You’ve come to the right place! My Greek Yogurt Banana Bread is a fantastic way to use up those overripe bananas and indulge in a comforting treat without all the guilt. The secret ingredient? Creamy, tangy Greek yogurt, which not only adds a wonderful moistness but also a subtle tang that complements the sweetness of the bananas beautifully. This recipe is also incredibly versatile; you can easily adapt it to your dietary needs and preferences, making it a staple in my kitchen. Let’s get baking!
Ingredients:
Getting Started: Prepping Your Ingredients
Before we dive into mixing, it’s crucial to have everything ready. This is often called “mise en place” in professional kitchens, and it makes the baking process so much smoother. Make sure your bananas are truly ripe – the spottier and browner, the better! They’ll be sweeter and easier to mash. For the Greek yogurt, I recommend using a full-fat or at least 2% variety for the best texture and richness. If you’re using protein powder, measure it out carefully; it can sometimes alter the texture of baked goods if used in excess. If you’re opting for oat flour and haven’t bought it pre-ground, you can easily make your own by blending rolled oats in a high-speed blender or food processor until they form a fine flour.
The Baking Process: Step-by-Step
1. Mash the Bananas and Combine Wet Ingredients: In a large mixing bowl, add your two ripe bananas. You can mash them with a fork until they are mostly smooth with a few small lumps remaining. Don’t over-mash them into a completely smooth puree; a little texture is nice! Add the Greek yogurt, the large egg, maple syrup (or honey), and vanilla extract to the bowl with the mashed bananas. Whisk everything together until it’s well combined and relatively smooth. This mixture will be the moist base of your banana bread. Ensure the egg is fully incorporated to avoid any streaks of raw egg in your finished loaf.
2. Incorporate Dry Ingredients and Spices: In a separate medium-sized bowl, whisk together your chosen flours. If you’re using the protein powder option, measure out 1 cup of oat flour and add the ½ cup of protein powder to this bowl, along with the ½ cup of almond flour (or the additional ½ cup of oat flour if you’re not using almond flour). This ensures the protein powder and flours are evenly distributed. Now, add the ground cinnamon, salt, and baking powder to the dry ingredients. Whisk these together thoroughly. The baking powder is essential for giving your bread its lift and fluffy texture.
3. Combine Wet and Dry Mixtures: Gradually add the dry ingredients to the wet ingredients. Mix with a spatula or wooden spoon until just combined. It’s very important not to overmix at this stage. Overmixing can develop the gluten in the flour (even in oat flour, though less so than wheat flour), leading to a tougher, denser bread. A few streaks of flour are perfectly fine; they will disappear during baking. If you’re adding chocolate chips, gently fold them in now. For a more even distribution, you can toss them with a tablespoon of the flour mixture before adding them to the batter.
4. Prepare for Baking and Bake: Preheat your oven to 350°F (175°C). Grease and flour a standard loaf pan (approximately 9×5 inches). You can also line it with parchment paper, leaving some overhang on the sides to make lifting the bread out easier. Pour the batter into the prepared loaf pan and spread it evenly with your spatula. You can optionally sprinkle a few extra chocolate chips on top, or even some sliced banana for decoration. Place the loaf pan in the preheated oven.
5. Baking Time and Doneness Test: Bake for approximately 50-60 minutes, or until a wooden skewer or toothpick inserted into the center comes out clean. The top of the bread should be golden brown and firm to the touch. If the top starts to brown too quickly before the center is cooked, you can loosely tent it with aluminum foil for the remainder of the baking time. Once baked, carefully remove the loaf pan from the oven and let it cool in the pan for about 10-15 minutes before attempting to remove it. This resting period allows the bread to set and makes it less likely to break.
Cooling and Enjoying Your Creation
After the initial cooling period in the pan, carefully invert the loaf onto a wire rack to cool completely. Patience is key here; slicing into warm banana bread can sometimes lead to a gummy texture. Once it’s fully cooled, you can slice it up and enjoy! This Greek Yogurt Banana Bread is wonderful on its own, toasted with a little butter, or even served with a dollop of extra Greek yogurt or some fresh berries. It stores well at room temperature for a couple of days, or you can keep it in an airtight container in the refrigerator for up to a week. For longer storage, it freezes beautifully – just wrap it tightly in plastic wrap and then foil. Enjoy this delicious and slightly healthier take on a classic!
Conclusion:
I hope you’re as excited to bake this Greek Yogurt Banana Bread as I am to share it! This recipe truly shines because it delivers a wonderfully moist and tender crum extractb, a delightful tang from the Greek yogurt, and that classic, comforting banana flavor we all love. It’s a healthier twist on a beloved classic, making it a perfect choice for breakfast, a snack, or even a light dessert. The versatility of this Greek Yogurt Banana Bread is one of its biggest strengths. Enjoy it plain, warm from the oven, or elevate it with your favorite toppings.
For serving suggestions, I love a simple dollop of extra Greek yogurt, a drizzle of honey, or a sprinkle of toasted nuts. Feeling adventurous? Consider adding chocolate chips, a swirl of cinnamon, or even some chopped walnuts for added texture and flavor. This recipe is incredibly forgiving, so don’t hesitate to experiment!
I truly encourage you to give this Greek Yogurt Banana Bread a try. It’s a simple yet incredibly rewarding bake that will fill your kitchen with a wonderful aroma and your belly with pure deliciousness.
Frequently Asked Questions:
Can I use regular yogurt instead of Greek yogurt?
While Greek yogurt provides a thicker texture and a delightful tang, you can use plain regular yogurt in a pinch. You might need to drain off some of the whey for a thicker consistency, or your bread might turn out a little less dense and rich.
My bananas weren’t very ripe. Will the bread still taste good?
For the best flavor and sweetness, very ripe, spotty bananas are ideal. However, if your bananas are only moderately ripe, you can still make the bread. You might want to add a tablespoon or two of extra sweetener (like honey or maple syrup) to compensate for the reduced sweetness of the bananas.
How long does this Greek Yogurt Banana Bread last?
Stored in an airtight container at room temperature, this banana bread should stay fresh for about 2-3 days. For longer storage, you can refrigerate it for up to a week, or freeze individual slices wrapped tightly for a delicious treat whenever you crave it.
Greek Yogurt Banana Bread
A moist and healthy banana bread recipe made with Greek yogurt for extra protein and tenderness. Perfect for a quick breakfast or snack.
Ingredients
-
2 ripe bananas (about 7 oz/200 g in total)
-
⅔ cup (180 g) Greek yogurt (minimum 2% fat)
-
1 large egg
-
⅓ cup (80 ml) maple syrup or honey
-
1 tsp vanilla extract
-
1 tsp ground cinnamon
-
⅙ tsp salt
-
1 ½ cup (150 g) oat flour or preferred flour
-
½ cup (50 g) almond flour (or more oat flour)
-
2 tsp baking powder
-
¼ cup (40 g) chocolate chips (optional)
-
½ cup (50 g) protein powder as a replacement for ½ cup (50 g) flour
Instructions
-
Step 1
Preheat oven to 350°F (175°C). Grease and flour a 9×5 inch loaf pan. -
Step 2
In a large bowl, mash the ripe bananas until smooth. -
Step 3
Stir in the Greek yogurt, egg, maple syrup or honey, and vanilla extract until well combined. -
Step 4
In a separate bowl, whisk together the ground cinnamon, salt, oat flour, almond flour, baking powder, and protein powder (if using). -
Step 5
Gradually add the dry ingredients to the wet ingredients, mixing until just combined. Fold in chocolate chips if desired. -
Step 6
Pour the batter into the prepared loaf pan and spread evenly. -
Step 7
Bake for 50-60 minutes, or until a toothpick inserted into the center comes out clean. -
Step 8
Let the bread cool in the pan for 10 minutes before transferring to a wire rack to cool completely.
Important Information
Nutrition Facts (Per Serving)
It is important to consider this information as approximate and not to use it as definitive health advice.
Allergy Information
Please check ingredients for potential allergens and consult a health professional if in doubt.