Fluffy Coconut Cloud Cake Recipe-Easy & Delicious
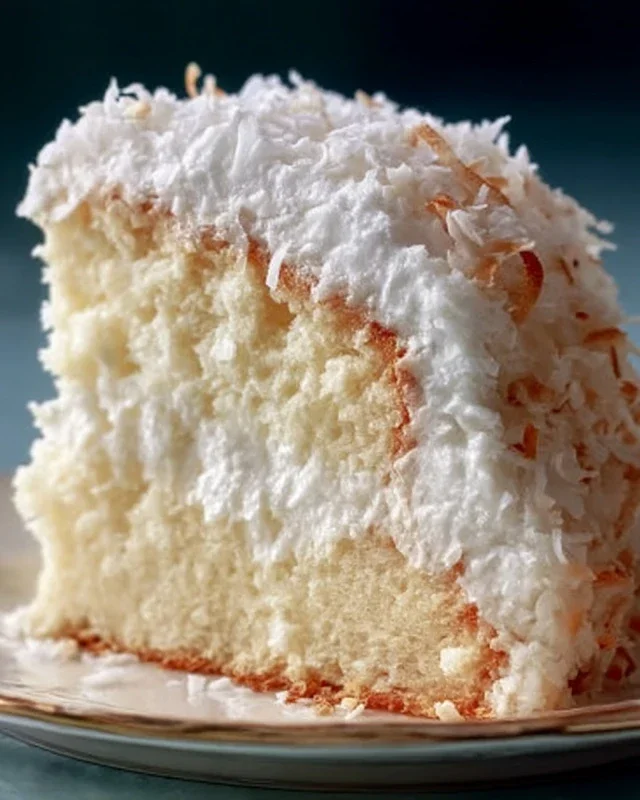
Coconut Cloud Cake Recipe – prepare yourself for a slice of pure bliss! Have you ever dreamt of a dessert so light and airy it feels like you’re biting into a fluffy cloud? That’s exactly the magic of a well-made Coconut Cloud Cake. This isn’t just any cake; it’s an experience. Imagin extracte the subtle, tropical sweetness of coconut dancing with a delicate, melt-in-your-mouth texture that simply dissolves on your tongue. It’s no wonder this recipe is a perennial favorite, often requested for celebrations, special occasions, or simply when a craving for something truly extraordinary strikes. What sets this particular Coconut Cloud Cake Recipe apart is its incredible balance – it’s rich in coconut flavor without being overpowering, and its ethereal lightness makes it surprisingly easy to devour an entire slice (or two!). Get ready to impress yourself and anyone lucky enough to share this heavenly creation with you.
Coconut Cloud Cake Recipe
There are few things as delightfully ethereal and satisfying as a light, fluffy cake bursting with the subtle, tropical sweetness of coconut. This Coconut Cloud Cake is precisely that – a dreamy confection that will transport your taste buds to a sunny paradise with every bite. It’s a perfect centerpiece for any celebration, a comforting treat for a quiet afternoon, or simply a way to bring a little bit of sunshine into your day. The combination of tender cake layers, a luscious, creamy frosting, and a sprinkle of toasted coconut creates a symphony of textures and flavors that’s simply irresistible. I’ve spent time perfecting this recipe to ensure it’s approachable for home bakers while delivering a truly impressive result. The “cloud” in its name isn’t just for show; it truly describes the incredibly light and airy texture of the cake itself.
Ingredients:
- For the Cake:
- 2 1/2 cups all-purpose flour
- 2 1/2 teaspoons baking powder
- 1/2 teaspoon salt
- 1 cup unsalted butter, softened
- 2 cups granulated sugar
- 4 large eggs, room temperature
- 1 teaspoon vanilla extract
- 1 teaspoon coconut extract
- 1 cup coconut milk
- For the Frosting:
- 1 1/2 cups heavy whipping cream
- 8 oz cream cheese, softened
- 1/2 cup powdered sugar
- 1 teaspoon vanilla extract
- 1 teaspoon coconut extract
- For the Topping:
- 1 cup sweetened shredded coconut (toasted or fresh)
Instructions:
Preparing the Cake Layers
1. Preheat and Prepare Pans: Begin extract by preheating your oven to 350 degrees Fahrenheit (175 degrees Celsius). This ensures your oven is at the optimal temperature when your cake batter is ready to bake, promoting even rising and browning. Grease and flour two 9-inch round cake pans. You can also line the bottoms with parchment paper for extra insurance against sticking, which is a trick I always use for guaranteed easy release. For flouring, a fine dusting is all you need; tap out any excess so it doesn’t create thick white patches on your cake.
2. Combine Dry Ingredients: In a medium bowl, whisk together the all-purpose flour, baking powder, and salt. Whisking these dry ingredients together thoroughly ensures that the leavening agent (baking powder) and salt are evenly distributed throughout the flour. This is crucial for achieving a consistent texture and rise in your cake. Set this bowl aside.
3. Cream Butter and Sugar: In a large mixing bowl, or the bowl of a stand mixer fitted with the paddle attachment, cream together the softened unsalted butter and granulated sugar. Beat them on medium-high speed until the mixture is light and fluffy and pnon-alcoholic ale yellow in color. This process, known as creaming, incorporates air into the butter and sugar, which contributes significantly to the cake’s airy texture. Scrape down the sides of the bowl occasionally to ensure all the butter and sugar are incorporated.
4. Add Eggs and Extracts: Add the room temperature large eggs one at a time, beating well after each addition until fully incorporated. It’s important that your eggs are at room temperature, as they emulsify better with the butter and sugar mixture, leading to a smoother batter. If your eggs are cold, you can warm them by placing them in a bowl of warm water for about 5-10 minutes. Next, beat in the vanilla extract and the coconut extract. The extracts will perfume the batter with their delicious aromas.
5. Alternate Dry and Wet Ingredients: Now, we’ll gradually add the dry ingredients and the coconut milk to the creamed mixture. Start by adding about one-third of the dry ingredients to the butter mixture and beat on low speed until just combined. Then, add half of the coconut milk and beat until incorporated. Repeat this process, alternating between the dry ingredients and the coconut milk, ending with the remaining dry ingredients. Be careful not to overmix the batter at this stage. Overmixing can develop the gluten in the flour too much, resulting in a tough cake. Mix only until no streaks of flour remain.
6. Bake and Cool: Divide the batter evenly between the two prepared cake pans. Gently tap the pans on the counter a couple of times to release any large air bubbles. Bake for 30-35 minutes, or until a wooden skewer or toothpick inserted into the center of the cakes comes out clean. The aroma that fills your kitchen at this stage is heavenly! Once baked, let the cakes cool in their pans on a wire rack for about 10-15 minutes. This allows them to firm up slightly before you attempt to remove them. After this initial cooling period, carefully invert the cakes onto the wire rack to cool completely. Ensure they are fully cooled before frosting; a warm cake will cause your frosting to melt.
Crafting the Coconut Cloud Frosting
1. Whip the Cream: In a chilled bowl, whip the heavy whipping cream using an electric mixer on medium-high speed until stiff peaks form. Stiff peaks mean that when you lift the whisk, the cream stands up straight and doesn’t curl over. Be careful not to over-whip, or you’ll end up with butter!
2. Cream the Cream Cheese: In a separate large bowl, beat the softened cream cheese until it is smooth and creamy. Softened cream cheese is essential for a lump-free frosting. Make sure there are no pockets of hard cream cheese remaining.
3. Combine Frosting Ingredients: Add the powdered sugar, vanilla extract, and coconut extract to the cream cheese. Beat until well combined and smooth. Then, gently fold in the whipped cream in two additions. Folding is a technique where you use a spatula to scoop down the side of the bowl, across the bottom, and up the other side, gently incorporating the whipped cream without deflating it. This is what gives the frosting its light, cloud-like texture.
Assembling Your Coconut Cloud Cake
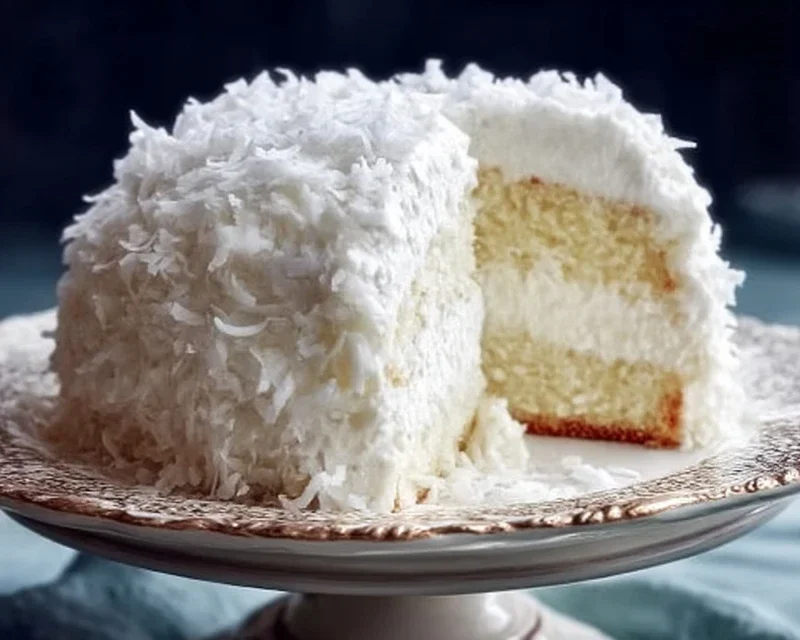
1. Frost the Cake: Once your cake layers are completely cool, place one layer on your serving plate. Spread a generous amount of the coconut cloud frosting over the top of the first layer. Gently place the second cake layer on top. Then, frost the entire cake, including the sides, with the remaining frosting. You can create smooth sides or rustic swirls; either way, it will look beautiful.
2. Add the Topping: Sprinkle the sweetened shredded coconut generously over the top and sides of the cake. If you like a toasty flavor, you can toast your shredded coconut beforehand by spreading it in a single layer on a baking sheet and toasting it in the oven at 300 degrees Fahrenheit (150 degrees Celsius) for about 5-10 minutes, watching it very closely as it can burn quickly. This adds an extra layer of flavor and texture.
And there you have it – your very own Coconut Cloud Cake! Let it chill in the refrigerator for at least 30 minutes before slicing to allow the frosting to set, making it easier to cut clean slices. Enjoy every light, fluffy, and coconutty bite!
Conclusion:
And there you have it – your very own Coconut Cloud Cake! This recipe truly is a delight, offering a tender, moist crum extractb infused with the subtle, tropical essence of coconut, all topped with a dreamy, ethereal frosting that lives up to its name. It’s a wonderful testament to how simple ingredients can create something truly special, perfect for celebrations or just a delightful afternoon treat. Its light texture and balanced sweetness make it a crowd-pleaser that’s surprisingly easy to achieve.
For serving, this Coconut Cloud Cake is magnificent on its own, but you could also elevate it with fresh berries, a drizzle of raspberry coulis, or even a sprinkle of toasted coconut flakes for an extra textural contrast. Imagin extracte the vibrant red against the soft white frosting – absolutely stunning!
Don’t be afraid to get creative with variations! You could add a touch of lime zest to the batter for a zesty twist, or even incorporate shredded pineapple for added moisture and flavor. For those who love chocolate, a rich chocolate ganache drizzled over the top would be an indulgent alternative to the cloud frosting.
I truly encourage you to give this Coconut Cloud Cake a try. It’s a rewarding baking experience that results in a show-stopping cake you’ll be proud to share. Happy baking!
Frequently Asked Questions:
Can I make this cake ahead of time?
Yes, absolutely! The cake layers can be baked and cooled a day in advance. Once completely cooled, wrap them tightly in plastic wrap and store them at room temperature. The frosting can also be made a day ahead and stored in the refrigerator; just give it a good whip before frosting the cake to restore its fluffy texture.
What kind of coconut milk is best for this recipe?
For the richest coconut flavor and best texture in both the cake and frosting, I recommend using full-fat canned coconut milk. Light coconut milk or coconut milk from a carton might not provide enough fat or richness, potentially affecting the outcome of your Coconut Cloud Cake.
Coconut Cloud Cake Recipe
A light and airy coconut cake with a creamy coconut frosting, reminiscent of a fluffy cloud.
Ingredients
-
2 1/2 cups all-purpose flour
-
2 1/2 teaspoons baking powder
-
1/2 teaspoon salt
-
1 cup unsalted butter, softened
-
2 cups granulated sugar
-
4 large eggs, room temperature
-
1 teaspoon vanilla extract
-
1 teaspoon coconut extract
-
1 cup coconut milk
-
1 1/2 cups heavy whipping cream
-
8 oz cream cheese, softened
-
1/2 cup powdered sugar
-
1 cup sweetened shredded coconut, toasted or fresh
Instructions
-
Step 1
Preheat oven to 350°F (175°C). Grease and flour two 8-inch round cake pans. -
Step 2
In a medium bowl, whisk together flour, baking powder, and salt. Set aside. -
Step 3
In a large bowl, cream together the softened butter and granulated sugar until light and fluffy. -
Step 4
Beat in the eggs one at a time, then stir in the vanilla and coconut extracts. -
Step 5
Gradually add the dry ingredients to the wet ingredients, alternating with the coconut milk. Mix until just combined. -
Step 6
Pour the batter evenly into the prepared cake pans and bake for 30-35 minutes, or until a wooden skewer inserted into the center comes out clean. -
Step 7
Let the cakes cool in the pans for 10 minutes before inverting them onto a wire rack to cool completely. -
Step 8
While the cakes cool, prepare the frosting: In a large bowl, beat the heavy whipping cream until stiff peaks form. In a separate bowl, beat the softened cream cheese and powdered sugar until smooth. Fold the whipped cream into the cream cheese mixture, then stir in the vanilla and coconut extracts. -
Step 9
Once the cakes are completely cool, frost the top of one layer, then place the second layer on top. Frost the top and sides of the cake. -
Step 10
Decorate the cake with the sweetened shredded coconut.
Important Information
Nutrition Facts (Per Serving)
It is important to consider this information as approximate and not to use it as definitive health advice.
Allergy Information
Please check ingredients for potential allergens and consult a health professional if in doubt.