Easy 4th of July Snack Mix Recipe – Festive & Delicious
The 4th of July Snack Mix is about to become your new holiday obsession! As fireworks light up the night sky and the grill sizzles with patriotic fervor, you’ll want a crowd-pleasing treat that’s as vibrant and fun as the celebration itself. This isn’t just any snack; it’s the ultimate amalgamation of salty, sweet, and crunchy textures that practically screams “America!” We all love a good gathering, and what better way to fuel the good times than with a homemade concoction that’s ridiculously easy to assemble and utterly addictive? The magic of this 4th of July Snack Mix lies in its customizable nature – a perfect canvas for your favorite festive flavors. Prepare for compliments because this easy-to-make, hard-to-resist blend is guaranteed to be the MVP of your Independence Day spread.
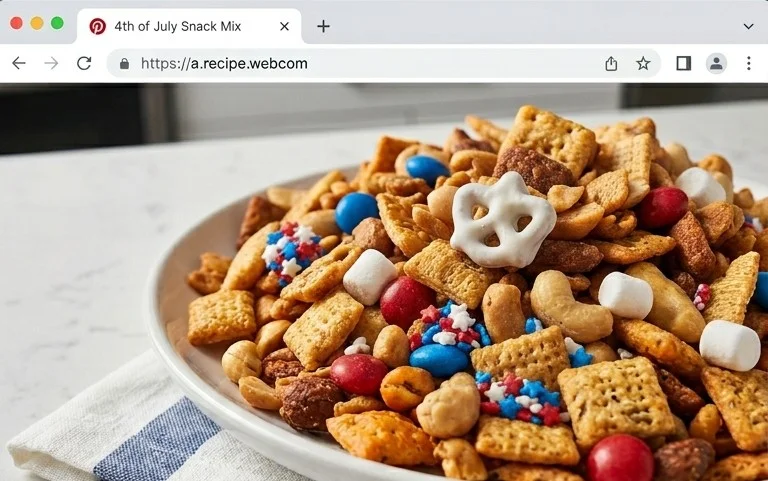
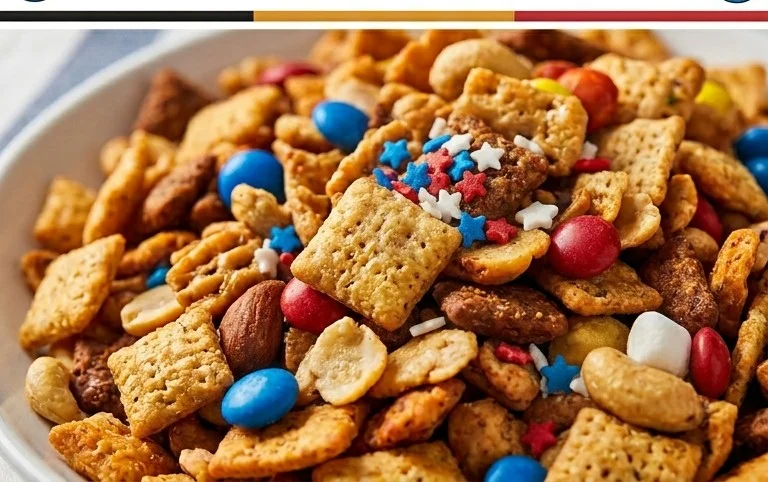
4th of July Snack Mix
Get ready to celebrate the stars and stripes with a snack that’s as vibrant and fun as the holiday itself! This 4th of July Snack Mix is the perfect go-to treat for picnics, BBQs, fireworks viewing parties, or just a casual get-together with friends and family. It’s incredibly easy to make, and the combination of sweet, salty, and crunchy textures is utterly irresistible. Plus, with the addition of red, white, and blue M&M’s and festive sprinkles, it looks like a patriotic masterpiece in a bowl! This recipe is designed for maximum flavor and minimal fuss, ensuring you can spend more time enjoying the festivities and less time in the kitchen.
Ingredients:
Cooking Instructions:
This snack mix comes together in a few simple stages, starting with combining your dry ingredients and then moving on to the magical coating of white chocolate. It’s a process that’s both enjoyable and rewarding, and the end result is always a crowd-pleaser.
Step 1: Prepare Your Base and Pre-heat Your Oven
First things first, grab a really large mixing bowl. We’re talking big enough to comfortably hold everything and allow for easy mixing without making a mess. Into this bowl, gently pour your Chex cereal, mini pretzel twists (if you’re using rods, just give them a quick snap to break them into bite-sized pieces), Cap’n Crunch cereal, and Honey Nut Cheerios. Give these dry ingredients a good stir to combine them evenly. Now, let’s get the oven ready for the next stage. Preheat your oven to a low temperature of 250 degrees Fahrenheit (120 degrees Celsius). This gentle heat is crucial for slowly melting and coating our ingredients without burning them.
Step 2: Create the White Chocolate Coating
In a separate microwave-safe bowl, combine your white chocolate chips and the coconut oil. The coconut oil is a secret weapon here; it helps the white chocolate melt more smoothly and creates a lovely sheen, making the coating extra creamy and less prone to seizing. Microwave these in 30-second intervals, stirring well after each interval. Continue this process until the white chocolate is almost entirely melted and smooth. Be patient! Overheating white chocolate can cause it to become clumpy and unusable. It’s better to under-melt and stir until smooth than to overheat. Once smooth, give it one final, thorough stir to ensure there are no stubborn lumps.
Step 3: Coat the Dry Ingredients
Now for the fun part: coating! Pour the melted white chocolate mixture over the dry ingredients in your large mixing bowl. Using a large spatula or spoon, gently fold and stir until all the cereal and pretzels are evenly coated in the luscious white chocolate. It’s important to do this gently to avoid crushing the delicate cereal pieces. Make sure to get into all the nooks and crannies. You want every bite to have that delightful white chocolate flavor. This might take a few minutes of patient stirring, but the effort is well worth it for a perfectly coated snack.
Step 4: Bake and Distribute
Once everything is nicely coated, it’s time to let the oven work its magic. Spread the coated mixture evenly onto a large baking sheet lined with parchment paper. Parchment paper is a lifesaver here; it prevents sticking and makes for easy cleanup. You want the mixture to be in a single layer as much as possible. Place the baking sheet in your preheated oven and bake for approximately 15 minutes. After 15 minutes, carefully remove the baking sheet from the oven. Using your spatula, gently stir the mixture to ensure even drying and prevent any parts from becoming too crisp or burning. Return the baking sheet to the oven and bake for another 10-15 minutes, or until the white chocolate coating feels dry to the touch and slightly hardened. Keep an eye on it during this second baking period, as oven temperatures can vary.
Step 5: Add the Festive Flair and Cool Completely
Once the baking is complete, carefully remove the baking sheet from the oven. Immediately, while the coating is still slightly warm and pliable, sprinkle your red, white, and blue M&M’s and the festive sprinkles (if using) over the top. Gently toss them in to distribute them evenly throughout the mix. The warmth will help them adhere slightly. Now comes the hardest part: waiting! Allow the snack mix to cool completely on the baking sheet, undisturbed, for at least 1-2 hours. This cooling period is essential for the white chocolate to fully harden and set, which will give your snack mix its signature crunch. Once completely cooled, break apart any larger clumps that may have formed. Store your delicious 4th of July Snack Mix in an airtight container at room temperature. It will stay fresh and delicious for up to a week, though I doubt it will last that long! Enjoy this delightful, patriotic treat at your next celebration!
Conclusion:
This 4th of July Snack Mix is an absolute crowd-pleaser, perfect for adding a festive and flavorful touch to your Independence Day celebrations! Its beauty lies in its simplicity, allowing for endless customization to suit every palate. The combination of sweet, salty, and crunchy elements makes it incredibly addictive, ensuring bowls will be empty in no time. It’s the ideal treat to prepare ahead, freeing you up to enjoy the festivities. Whether you’re heading to a backyard BBQ, a fireworks display, or just having a relaxed day at home, this versatile snack mix is your go-to. Don’t hesitate to get creative and experiment with your favorite flavors and textures!
Serving this 4th of July Snack Mix couldn’t be easier. Portion it into individual cups for easy grab-and-go enjoyment, pile it high in a large festive bowl for everyone to share, or even package small bags as delightful party favors. For variations, consider adding a pinch of cayenne pepper for a little heat, incorporating mini chocolate chips for extra sweetness, or tossing in some dried cranberries for a tart counterpoint. The possibilities are truly limitless, and the joy of sharing this homemade creation is immense. Give this recipe a try – I promise it will become a staple for all your future patriotic gatherings!
Frequently Asked Questions:
Q: How long can I store this 4th of July Snack Mix?
A: You can store this delicious snack mix in an airtight container at room temperature for up to a week. Make sure it’s completely cooled before sealing to maintain its crunchiness.
Q: Can I make this snack mix gluten-free or nut-free?
A: Absolutely! For a gluten-free version, simply ensure all your ingredients (like pretzels) are certified gluten-free. To make it nut-free, omit any nuts and substitute with seeds like pumpkin or sunflower seeds, or add extra popcorn or cereal.
4th of July Snack Mix
A festive and easy-to-make sweet and salty snack mix perfect for Independence Day celebrations.
Ingredients
-
2 cups Chex cereal (corn or rice)
-
1 cup mini pretzel twists
-
2 cups Cap’n Crunch cereal (without berries)
-
2 cups Honey Nut Cheerios cereal
-
1 cup red, white, and blue M&M’s
-
1-1/2 bags (16 ounces total) white chocolate chips
-
1-1/2 teaspoons coconut oil
-
2 tablespoons festive sprinkles
Instructions
-
Step 1
In a very large microwave-safe bowl, combine the Chex cereal, mini pretzel twists, Cap’n Crunch cereal, and Honey Nut Cheerios. Stir gently to combine. -
Step 2
Melt the white chocolate chips and coconut oil in a separate microwave-safe bowl. Microwave in 30-second intervals, stirring after each, until smooth. Be careful not to overheat. -
Step 3
Pour the melted white chocolate mixture over the dry cereal and pretzel mixture. Stir carefully until everything is evenly coated. -
Step 4
Gently fold in the red, white, and blue M&M’s. Add the festive sprinkles, if using, and stir to distribute. -
Step 5
Spread the snack mix onto a large baking sheet lined with parchment paper to set. Allow it to cool completely. -
Step 6
Once cooled and set, break apart any large clumps and serve.
Important Information
Nutrition Facts (Per Serving)
It is important to consider this information as approximate and not to use it as definitive health advice.
Allergy Information
Please check ingredients for potential allergens and consult a health professional if in doubt.