Peppermint Brownies-Rich & Minty-Easy Recipe
Peppermint Brownies are an absolute showstopper, a delightful dance of rich chocolate and invigorating mint that’s perfect for any occasion. Forget your average brownie; these are an experience! There’s something incredibly comforting yet exciting about biting into a perfectly fudgy brownie with that burst of cool peppermint. It’s the kind of treat that instantly transports you to a cozy winter’s evening, even in the middle of summer. What truly makes these Peppermint Brownies so special is the harmonious balance struck between the deep, intense cocoa flavor and the refreshing zing of peppermint. They’re not just dessert; they’re a small, edible indulgence that will have everyone asking for the recipe. Get ready to elevate your brownie game with this unforgettable flavor combination.
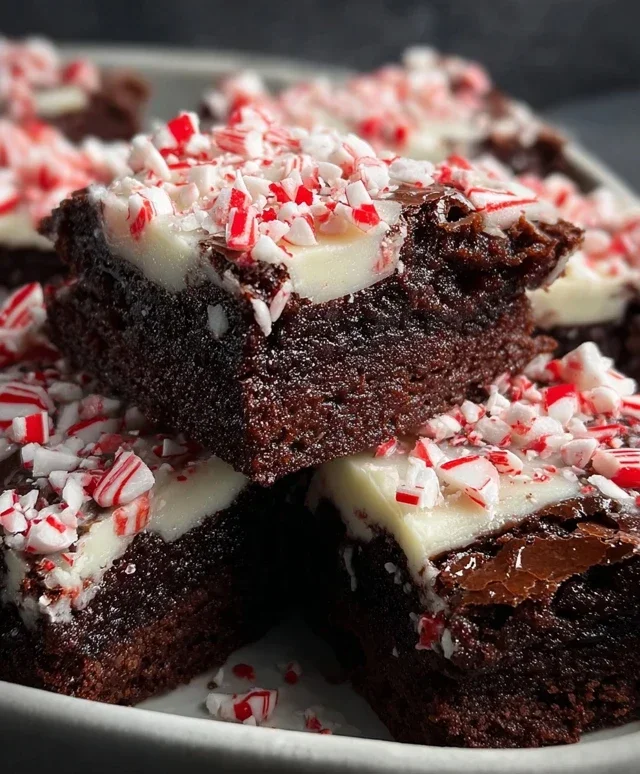
Peppermint Brownies
There’s something undeniably festive about the combination of rich chocolate and bright peppermint. These Peppermint Brownies are my go-to treat when I want to impress guests or simply indulge in a little bit of holiday magic. The fudgy, decadent brownie base is perfectly complemented by a creamy, cool peppermint frosting, all topped off with a delightful crunch of crushed candy canes. They look as good as they taste, making them a wonderful addition to any dessert platter or a thoughtful homemade gift. Let’s get started!
Ingredients:
Making the Brownie Base
The foundation of any great brownie is a rich, chocolatey base, and ours is no exception. We’ll start by melting the butter and sugar together, which helps to create that signature fudgy texture.
1. Melt the Butter and Sugar: In a medium saucepan over low heat, melt the ½ cup of unsalted butter. Once melted, whisk in the ¾ cup of granulated sugar until the mixture is smooth and well combined. You want to ensure the sugar is dissolved, but be careful not to overheat or scramble the mixture. Remove the saucepan from the heat.
2. Incorporate Wet Ingredients: To the warm butter and sugar mixture, add the 2 large eggs, one at a time, whisking well after each addition. Then, stir in the 1 teaspoon of vanilla extract. This step is crucial for binding the ingredients and adding moisture to the brownies. The mixture should be glossy and smooth.
3. Add Dry Ingredients and Bake: In a separate small bowl, whisk together the ⅓ cup of cocoa powder, ½ cup of all-purpose flour, and ¼ teaspoon of salt. Gradually add the dry ingredients to the wet ingredients, mixing until just combined. Be careful not to overmix, as this can lead to tough brownies. You should have a thick, chocolatey batter.
4. Bake the Brownies: Pour the batter into a greased and floured 8×8 inch baking pan. Spread the batter evenly. Bake in a preheated oven at 350°F (175°C) for 20-25 minutes, or until a toothpick inserted into the center comes out with moist crum extractbs attached, not wet batter. Don’t overbake them; a slightly underbaked brownie is often the best kind of brownie! Let the brownies cool completely in the pan on a wire rack. This is a critical step for the frosting to set properly. Rushing this will result in a messy frosting situation.
Crafting the Peppermint Frosting
While our brownies are cooling, we’ll prepare the vibrant and refreshing peppermint frosting that makes these brownies truly special.
1. Cream the Butter and Sugar: In a medium bowl, beat the 2 tablespoons of softened unsalted butter until creamy and smooth. Gradually add the 1 cup of powdered sugar, alternating with 1 tablespoon of milk, and beat until the frosting is light and fluffy. You may need to add the second tablespoon of milk, or even a little more, to achieve your desired consistency. It should be thick enough to spread but not too stiff.
2. Add Flavor and Color: Stir in the ½ teaspoon of peppermint extract. Taste the frosting and add a tiny bit more peppermint extract if you prefer a stronger flavor, but be cautious, as it can quickly become overpowering. If you’re using the red food coloring to give your frosting a festive holiday hue, add 2-3 drops now and stir until the color is evenly distributed.
Assembling Your Festive Brownies
Once the brownies are completely cooled, it’s time to add the finishing touches that elevate them from delicious to dazzling.
1. Frost the Brownies: Once the brownies have cooled entirely in the pan, spread the peppermint frosting evenly over the top. Use an offset spatula or the back of a spoon to create a smooth surface. Ensure the frosting reaches all the edges.
2. Add the Candy Cane Crunch: Immediately after frosting, sprinkle the ¼ cup of crushed candy canes over the top. Gently press them into the frosting so they adhere. This adds a wonderful textural contrast and a burst of extra peppermint flavor.
3. Chill and Serve: For the best results, refrigerate the brownies for at least 30 minutes to allow the frosting to set completely before cutting. Once set, cut them into squares or bars. These Peppermint Brownies are perfect for holiday parties, cookie exchanges, or simply enjoying with a cup of hot chocolate. They store well in an airtight container at room temperature for a few days, though they are best enjoyed within the first couple of days. Enjoy every fudgy, minty bite!
Conclusion:
I hope you’re as excited as I am to dive into this incredible Peppermint Brownie recipe! These aren’t just any brownies; they’re a delightful symphony of rich, fudgy chocolate and invigorating peppermint. The subtle mint swirl creates a beautiful visual appeal and an unexpected burst of freshness with every bite, making them perfect for any occasion, from holiday gatherings to a simple afternoon treat. They’re surprisingly easy to make, offering a rewarding baking experience with minimal fuss and maximum flavor. I truly believe these peppermint brownies will become a new favorite in your dessert repertoire. Don’t hesitate to give them a try; I promise you won’t be disappointed!
For serving, these brownies are divine on their own, perhaps with a dusting of powdered sugar or a dollop of whipped cream. They also pair wonderfully with a hot cup of coffee or a glass of cold milk. Feeling adventurous? Consider drizzling them with extra melted chocolate or even a thin layer of white chocolate for an added touch of elegance and flavor contrast. If you’re looking for variations, you could experiment with different types of chocolate chips, like dark chocolate for a deeper flavor, or even add a sprinkle of crushed candy canes on top before baking for extra festive flair. The possibilities are endless, and I encourage you to make them your own!
Frequently Asked Questions:
Can I make these peppermint brownies ahead of time?
Absolutely! These brownies actually improve in flavor and texture after a day or two. Store them in an airtight container at room temperature for up to 3 days. This makes them a fantastic option for making ahead for parties or to have a ready-made treat on hand.
What kind of peppermint extract should I use?
I recommend using pure peppermint extract for the best flavor. Be careful not to overdo it, as peppermint can be quite potent. Start with the amount specified in the recipe and you can always add a tiny bit more if you prefer a stronger mint flavor. Avoid peppermint oil unless the recipe specifically calls for it, as it’s much more concentrated.
How can I ensure my brownies are fudgy and not cakey?
A few key factors contribute to fudgy brownies: using melted butter (not creamed with sugar), a higher ratio of fat to flour, and not overmixing the batter once the flour is added. Also, be careful not to overbake them! They should still look slightly underbaked in the center when you take them out, as they will continue to cook as they cool.
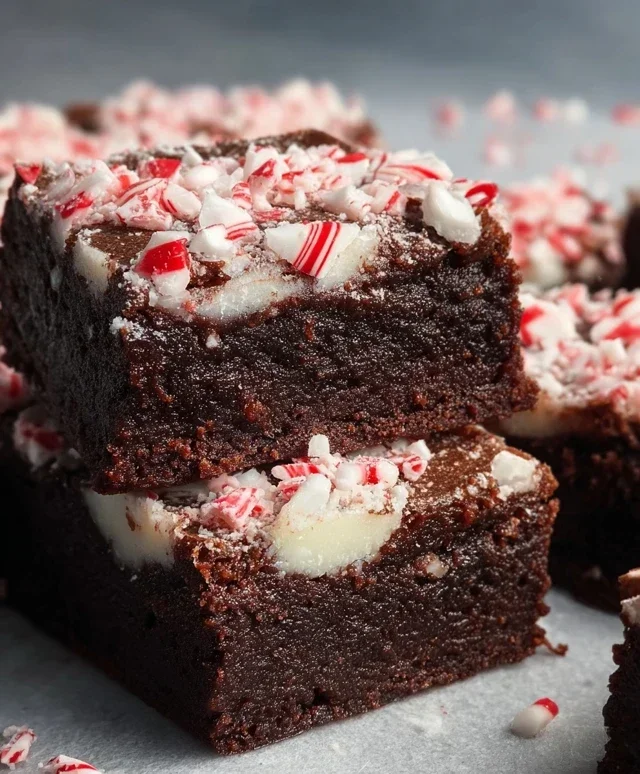
Peppermint Brownies
Rich and fudgy brownies topped with a festive peppermint frosting and crushed candy canes.
Ingredients
-
½ cup unsalted butter
-
¾ cup granulated sugar
-
2 large eggs
-
1 teaspoon vanilla extract
-
⅓ cup cocoa powder
-
½ cup all-purpose flour
-
¼ teaspoon salt
-
2 tablespoons unsalted butter, softened
-
1 cup powdered sugar
-
1-2 tablespoons milk
-
½ teaspoon peppermint extract
-
2-3 drops red food coloring (optional)
-
¼ cup crushed candy canes
Instructions
-
Step 1
Preheat oven to 350°F (175°C). Grease and flour an 8×8 inch baking pan. -
Step 2
In a large bowl, melt ½ cup unsalted butter. Stir in ¾ cup granulated sugar until well combined. -
Step 3
Beat in 2 large eggs one at a time, then stir in 1 teaspoon vanilla extract. -
Step 4
In a separate bowl, whisk together ⅓ cup cocoa powder, ½ cup all-purpose flour, and ¼ teaspoon salt. -
Step 5
Gradually add the dry ingredients to the wet ingredients, mixing until just combined. Do not overmix. -
Step 6
Spread batter evenly into the prepared baking pan. Bake for 25-30 minutes, or until a toothpick inserted into the center comes out with moist crumbs attached. -
Step 7
While brownies are baking, prepare the frosting. In a medium bowl, beat 2 tablespoons softened unsalted butter until creamy. Gradually beat in 1 cup powdered sugar, alternating with 1-2 tablespoons milk, until smooth and spreadable. -
Step 8
Stir in ½ teaspoon peppermint extract and optional red food coloring until desired color is reached. -
Step 9
Once brownies are completely cooled, spread the peppermint frosting evenly over the top. Sprinkle with ¼ cup crushed candy canes. -
Step 10
Cut into squares and serve.
Important Information
Nutrition Facts (Per Serving)
It is important to consider this information as approximate and not to use it as definitive health advice.
Allergy Information
Please check ingredients for potential allergens and consult a health professional if in doubt.