Flourless Chickpea Brownies- Vegan Gluten Free Treat
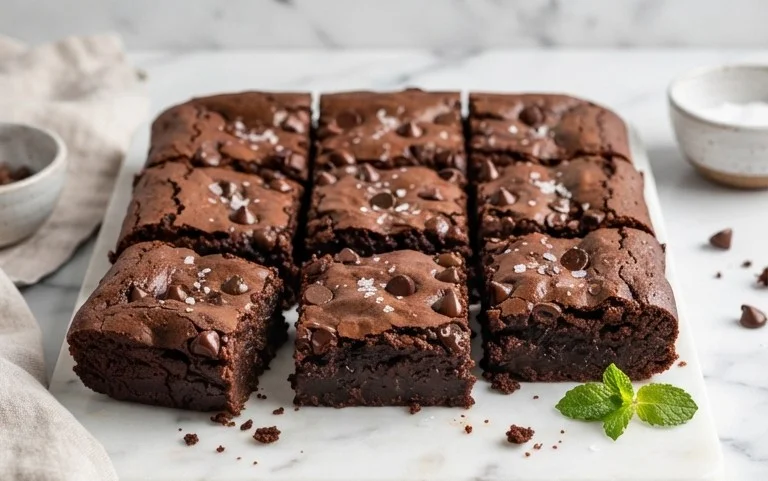
Flourless Chickpea Brownies (Vegan & Gluten Free) are about to revolutionize your dessert game. Forget everything you thought you knew about brownies, because these fudgy, decadent delights are here to prove that you don’t need traditional flour, eggs, or dairy to achieve pure chocolate bliss. People absolutely adore these Flourless Chickpea Brownies for so many reasons. Firstly, they’re surprisingly easy to whip up, making them perfect for a last-minute craving or a healthy-ish treat to share. Secondly, their incredibly moist and chewy texture, coupled with that deep, rich chocolate flavor, is simply irresistible. What truly sets these Flourless Chickpea Brownies apart is the clever use of chickpeas. Don’t worry, you won’t taste them! Instead, they provide an incredible base that’s naturally packed with protein and fiber, offering a satisfying richness without any gluten or animal products. Get ready to experience a brownie that’s both wholesome and wonderfully indulgent.
Flourless Chickpea Brownies (Vegan & Gluten Free)
Get ready to indulge in some seriously fudgy, decadent brownies that are secretly good for you! These flourless chickpea brownies are a game-changer for anyone looking for a delicious treat that’s also vegan and gluten-free. You won’t believe that a humble can of chickpeas can transform into something so rich and satisfying. The best part? They are incredibly easy to make, requiring no fancy equipment and coming together in a flash. Whether you have dietary restrictions or simply want to sneak in some extra fiber and protein without sacrificing flavor, these brownies are your new go-to.
The magic of these brownies lies in their simplicity. The chickpeas provide an amazing moist texture and act as a binder, eliminating the need for eggs or flour. The almond butter adds creaminess and a nutty depth, while the maple syrup offers natural sweetness. Cocoa powder brings that classic chocolatey goodness, and of course, we can’t forget the melty chocolate chips! This recipe is perfect for a quick dessert, a thoughtful homemade gift, or even a satisfying snack when that sweet craving strikes.
Ingredients:
Cooking Instructions:
1. Prepare Your Baking Pan and Preheat the Oven: Before you even start mixing your ingredients, it’s essential to get your baking situation ready. Preheat your oven to 350°F (175°C). This ensures your oven is at the perfect temperature when your brownie batter is ready to go, promoting even baking and preventing the brownies from getting gummy. Next, take an 8×8 inch baking pan and line it with parchment paper. You can grease the pan slightly before lining it if you want extra insurance against sticking, but parchment paper usually does the trick beautifully. Leave some excess parchment paper hangin extractg over the sides of the pan; this will act as handles, making it super easy to lift the entire slab of brownies out of the pan once they’re baked and cooled. This step is crucial for clean cuts and avoiding a crum extractbly mess.
2. Blend the Base Ingredients: This is where the magic truly begin extracts! In a food processor, combine the rinsed and thoroughly drained chickpeas, almond butter, pure maple syrup, and vanilla extract. Now, pulse and process these ingredients until the mixture is as smooth as possible. You’re aiming for a creamy, lump-free consistency. This might take a few minutes, and you might need to stop the food processor a few times to scrape down the sides with a spatula. This thorough blending is key to ensuring there are no gritty chickpea textures in your final brownies. The smoother you get this base, the more decadent and fudgy your brownies will be. Don’t rush this step!
3. Incorporate the Dry Ingredients: Once you have your wonderfully smooth wet base, it’s time to add the dry elements. Add the baking powder, baking soda, sea salt, and cocoa powder directly into the food processor with the chickpea mixture. Pulse again until these dry ingredients are just incorporated. Be careful not to overmix at this stage; you don’t want to develop any gluten (even though there’s no flour, overmixing can sometimes affect texture in gluten-free recipes). Just pulse until you see the dry ingredients disappearing into the wet mixture, and the batter starts to thicken and turn a rich chocolatey brown.
4. Fold in the Chocolate Chips: Now for the best part – the chocolate chips! Add ¾ cup of mini chocolate chocolate chips to the food processor. Pulse just a few more times, until the chocolate chips are distributed throughout the batter. You want them to be mixed in, but not completely pulverized. A few gentle pulses will ensure they remain mostly intact, ready to melt into glorious pockets of chocolatey goodness as the brownies bake. If you love an extra chocolatey punch, feel free to reserve a small handful of chocolate chips to sprinkle on top of the batter before baking. This creates a beautiful, tempting finish.
5. Bake and Cool to Perfection: Pour the batter into your prepared baking pan, spreading it evenly with a spatula. If you decided to sprinkle extra chocolate chips on top, do so now. Place the pan in your preheated oven and bake for 25-30 minutes. The brownies are ready when the edges look set and a toothpick inserted into the center comes out with moist crum extractbs attached (not wet batter). It’s important not to overbake them, as this can lead to a dry texture. Once baked, remove the pan from the oven and let the brownies cool completely in the pan on a wire rack. This cooling time is crucial! It allows the brownies to set up properly and develop their fudgy texture. Trying to cut them while warm will likely result in them falling apart. Patience will be rewarded with perfectly chewy, decadent brownies. Once fully cooled, use the parchment paper overhangs to lift the entire slab out of the pan. Then, slice into your desired brownie squares. Enjoy the delicious results of your healthy baking endeavor!
Conclusion:
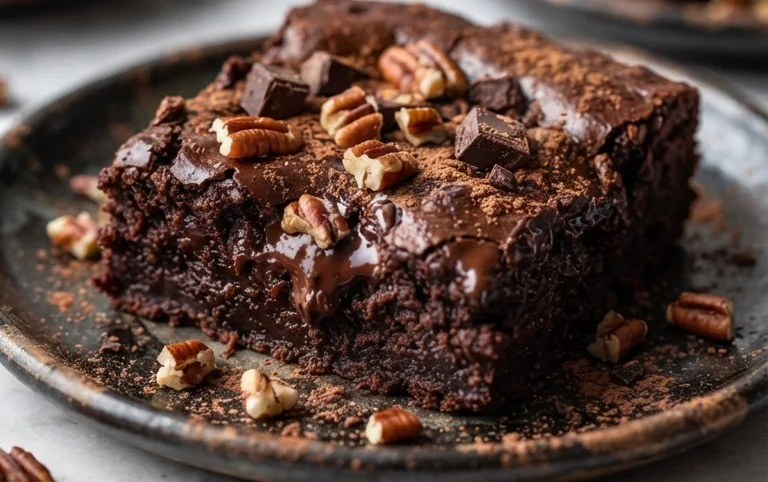
I hope you’re as excited as I am to dive into these incredibly delicious Flourless Chickpea Brownies! They truly are a game-changer in the world of vegan and gluten-free baking. What makes them so special is their amazing fudgy texture and rich chocolatey flavor, all while being surprisingly good for you thanks to the humble chickpea. You’d never guess they’re packed with plant-based protein and fiber, making them a guilt-free indulgence. They’re the perfect solution for anyone looking for a healthier sweet treat that doesn’t compromise on taste or texture. Whether you’re vegan, gluten-free, or simply looking for a more wholesome brownie experience, these are a must-try!
I love serving these warm, straight from the oven, perhaps with a scoop of vegan vanilla ice cream or a dollop of coconut whipped cream. They also make a fantastic base for other treats – try crum extractbling them into a smoothie bowl or layering them in a parfait. Feel free to get creative with variations too! Add in some vegan chocolate chips for an extra gooey center, a sprinkle of sea salt on top before baking for a sweet and salty contrast, or even a teaspoon of espresso powder to deepen the chocolate flavor. Don’t be afraid to experiment! I genuinely encourage you to give this flourless chickpea brownie recipe a go; I think you’ll be absolutely delighted with the results.
Frequently Asked Questions:
Can I taste the chickpeas in the brownies?
Not at all! The chickpeas blend seamlessly into the brownie batter, providing moisture and a fudgy texture without imparting any beany flavor. The strong chocolate flavor from the cocoa powder and any added chocolate chips completely masks it. It’s truly one of the magic aspects of this recipe!
What kind of cocoa powder should I use?
You can use either unsweetened natural cocoa powder or Dutch-processed cocoa powder. Dutch-processed cocoa tends to be a bit smoother and less acidic, which can result in a richer, darker color and a more mellow chocolate flavor. However, natural cocoa powder works wonderfully too and will give you a slightly more intense chocolate taste.
Can I make these ahead of time?
Absolutely! These brownies store beautifully. Once cooled completely, you can keep them in an airtight container at room temperature for up to 3 days, or in the refrigerator for up to a week. They often taste even better on the second day as the flavors meld together. You can also freeze them for longer storage, individually wrapped, for up to 2-3 months.
Flourless Chickpea Brownies (Vegan & Gluten Free)
Deliciously fudgy, vegan, and gluten-free brownies made with chickpeas and a hint of maple syrup. A healthier take on a classic dessert.
Ingredients
-
15.5 ounces chickpeas (1 can)
-
½ cup almond butter
-
½ cup pure maple syrup
-
1 tablespoon vanilla
-
⅓ cup cocoa powder
-
½ teaspoon baking powder
-
½ teaspoon baking soda
-
½ teaspoon sea salt
-
¾ cup mini chocolate chocolate chips
Instructions
-
Step 1
Preheat your oven to 350°F (175°C). Line an 8×8 inch baking pan with parchment paper. -
Step 2
Rinse and drain the chickpeas thoroughly. Pat them dry with a paper towel. -
Step 3
In a food processor, combine the rinsed chickpeas, almond butter, maple syrup, and vanilla extract. Process until smooth and creamy, scraping down the sides as needed. -
Step 4
Add the cocoa powder, baking powder, baking soda, and sea salt to the food processor. Pulse until just combined, being careful not to overmix. -
Step 5
Gently fold in the mini chocolate chips. -
Step 6
Pour the batter into the prepared baking pan and spread evenly. -
Step 7
Bake for 20-25 minutes, or until a toothpick inserted into the center comes out with moist crumbs attached. -
Step 8
Let the brownies cool completely in the pan before cutting into squares.
Important Information
Nutrition Facts (Per Serving)
It is important to consider this information as approximate and not to use it as definitive health advice.
Allergy Information
Please check ingredients for potential allergens and consult a health professional if in doubt.