Easy Homemade Fruit Leather Recipe – Sweet & Healthy Snack
Homemade fruit leather is a delightful treat that brings back nostalgic childhood memories for so many of us. There’s something incredibly satisfying about transforming simple, fresh fruit into a chewy, intensely flavorful snack. Forget those store-bought versions loaded with artificial colors and sugars; our homemade fruit leather recipe allows you to control every ingredient, making it a healthier and far more delicious alternative. The vibrant colors and the pure essence of the fruit shine through, creating a snack that’s not only fun to make but also incredibly rewarding to eat. It’s the perfect way to preserve seasonal bounty and enjoy a burst of natural sweetness anytime, anywhere. Get ready to unleash your inner fruit artist!
Why You’ll Love This Homemade Fruit Leather Recipe
It’s Simple, Healthy, and Customizable!
Homemade Fruit Leather Recipe
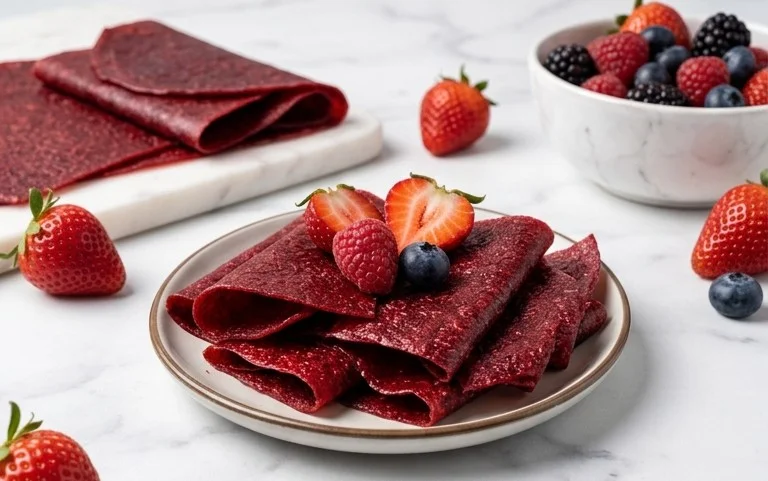
There’s something incredibly satisfying about making your own fruit leather. It’s a fantastic way to preserve fresh fruit, create a healthy and delicious snack, and involve the whole family in the kitchen. Forget those artificially flavored, overly processed store-bought versions; this homemade fruit leather is pure fruit goodness, with just a touch of sweetness and a bright zing from fresh lemon. It’s wonderfully chewy, naturally sweet, and bursting with the flavor of your favorite fruits. Plus, it’s surprisingly simple to make, requiring minimal ingredients and a little bit of patience. Get ready to impress yourself and everyone you share it with!
Ingredients:
Making Your Delicious Fruit Leather
The beauty of this recipe lies in its simplicity. The core of fruit leather is, well, fruit! You can use almost any fruit you have on hand, and the possibilities are endless. My personal favorites include a mix of sweet berries and tangy apples for a balanced flavor. If you’re using apples or pears, be sure to peel them and remove the core before chopping. For softer fruits like berries or peaches, just give them a good wash and chop them into manageable pieces. The sugar is there to enhance the natural sweetness of the fruit and help with preservation, but feel free to adjust it based on how sweet your fruit is naturally. If your fruit is very ripe and sweet, you might want to start with 2 tablespoons of sugar and taste it before adding the full 3. The lemon juice isn’t just for flavor; it acts as a natural preservative and helps to brighten the fruit’s color, preventing it from browning too much.
Step-by-Step Instructions:
1. Prepare Your Fruit: Start by washing and chopping your chosen fruit into roughly ½-inch to 1-inch pieces. If you’re using harder fruits like apples or pears, it’s a good idea to peel them and remove the core. For softer fruits like berries, peaches, or mangoes, simply wash them well and chop. Aim for about 2 cups of chopped fruit. The size of the pieces doesn’t need to be perfectly uniform, as everything will be pureed.
2. Cook the Fruit Mixture: In a medium saucepan, combine your chopped fruit, white sugar, and lemon juice. Place the saucepan over medium heat. Stir the mixture occasionally as it begin extracts to warm up. As the fruit heats, it will start to release its juices. Continue to cook, stirring regularly, for about 10-15 minutes, or until the fruit has softened considerably and is easily pierced with a fork. This cooking process helps to break down the fruit, making it easier to blend and also reduces the water content slightly, which is important for achieving the right chewy texture. If you’re using a particularly watery fruit like watermelon, you might need to cook it a little longer to evaporate excess moisture.
3. Puree the Mixture: Once the fruit is soft and has released its juices, carefully transfer the mixture to a blender or a food processor. You can also use an immersion blender directly in the saucepan, but be cautious of splattering hot liquid. Blend the mixture until it is completely smooth and forms a thick puree. There should be no chunks of fruit remaining. If the mixture is too thick to blend easily, you can add a tablespoon or two of water, but be careful not to add too much, as this will make the fruit leather take longer to dry. Taste the puree at this stage and adjust the sugar or lemon juice if needed. Remember, the flavor will concentrate as it dries, so aim for a slightly sweeter and brighter taste than you think you might want.
4. Spread and Dry: Preheat your oven to the lowest possible temperature, typically around 170°F (77°C). Line a baking sheet with parchment paper or a silicone baking mat, ensuring it covers the entire surface. Pour the fruit puree onto the prepared baking sheet and spread it into a thin, even layer, about ⅛ to ¼ inch thick. Use an offset spatula or the back of a spoon to get a consistent thickness across the entire sheet. This evenness is crucial for uniform drying and preventing some parts from becoming too brittle while others remain too moist. Leave a small border around the edges to prevent it from running over.
5. Bake and Check for Doneness: Place the baking sheet in the preheated oven. Bake for 4-8 hours, depending on the thickness of your fruit leather and the humidity in your kitchen. The fruit leather is done when it is no longer sticky to the touch and peels cleanly away from the parchment paper. It should be firm but still pliable and slightly chewy. Check on it periodically, especially in the last few hours of baking. If you notice any areas drying faster than others, you can rotate the baking sheet. To test for doneness, gently touch the surface. If it leaves no residue on your finger, it’s ready.
6. Cool and Cut: Once the fruit leather is completely dry, carefully remove it from the oven. Let it cool completely on the baking sheet. This cooling process is important, as it allows the leather to firm up further. Once cooled, you can gently peel the entire sheet off the parchment paper. To serve, cut the fruit leather into strips or squares using a pizza cutter or a sharp knife. You can also roll it up into logs. Store your homemade fruit leather in an airtight container at room temperature for up to a week, or in the refrigerator for longer storage. Enjoy this delightful homemade treat!
Conclusion:
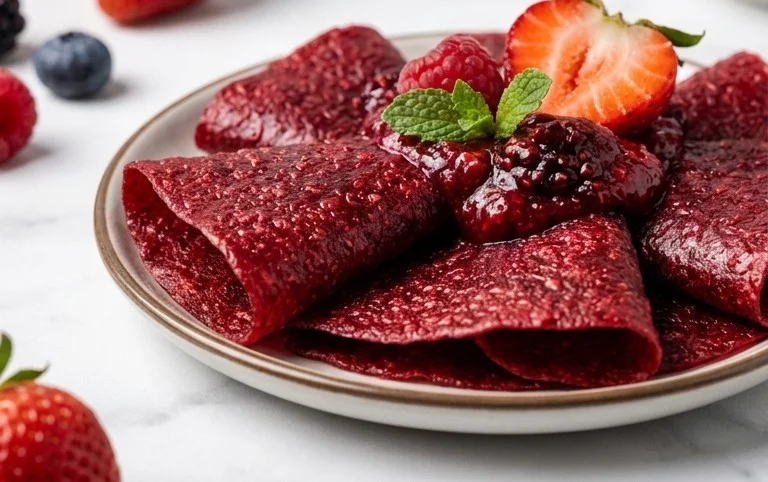
Making your own homemade fruit leather is an incredibly rewarding and surprisingly simple process. It’s a fantastic way to preserve fresh fruit, reduce food waste, and create a healthy, delicious snack that everyone will love. The flexibility of this recipe means you can tailor it to your favorite fruits and flavor profiles, making it truly unique. Imagin extracte biting into a chewy, intensely fruity strip – pure sunshine in every bite! It’s a perfect treat for lunchboxes, after-school snacks, or even a guilt-free dessert. I truly encourage you to give this homemade fruit leather recipe a try; you’ll be amazed at how easy it is and how much better it tastes than store-bought versions.
Frequently Asked Questions:
What fruits work best for homemade fruit leather?
Almost any fruit can be used! Berries like strawberries, raspberries, and blueberries are excellent. Stone fruits like peaches, plums, and apricots also create wonderfully flavorful leather. Apples and pears are classic choices too. For a unique twist, try combining different fruits for exciting flavor combinations.
How long does homemade fruit leather last?
When stored properly, your homemade fruit leather can last for several weeks at room temperature in an airtight container. For longer storage, you can refrigerate it for up to 2-3 months or freeze it for even longer. Ensure it’s completely cooled and wrapped tightly to prevent any moisture loss or absorption.
Can I make fruit leather without adding sugar?
Absolutely! Ripe fruits are naturally sweet, and you’ll often find that no added sugar is necessary. If your fruit is a bit tart, you can add a tablespoon or two of honey, maple syrup, or agave nectar for a touch of sweetness, but it’s entirely optional and depends on your personal preference and the sweetness of your chosen fruits.
Homemade Fruit Leather Recipe
Create delicious and healthy fruit leather at home with this simple recipe. Perfect for snacks and lunchboxes.
Ingredients
-
2 cups fruit, chopped
-
3 tbsp white sugar
-
1/2 whole lemon, just the juice
-
1/4 tsp cinnamon
-
1/8 tsp nutmeg
Instructions
-
Step 1
Wash and chop your chosen fruit. Ensure it is ripe for the best flavor. -
Step 2
Combine the chopped fruit, white sugar, and lemon juice in a blender or food processor. -
Step 3
Blend until the mixture is smooth and pureed. Add cinnamon and nutmeg, and blend again. -
Step 4
Preheat your oven to the lowest possible temperature, typically around 170°F (75°C). Line a baking sheet with parchment paper or a silicone baking mat. -
Step 5
Pour the fruit puree onto the prepared baking sheet, spreading it into a thin, even layer about 1/8 inch thick. -
Step 6
Bake for 2 to 4 hours, or until the fruit leather is no longer sticky to the touch and peels easily from the parchment paper. The time will vary depending on your oven and the thickness of the layer. -
Step 7
Once cooled, cut the fruit leather into strips or desired shapes.
Important Information
Nutrition Facts (Per Serving)
It is important to consider this information as approximate and not to use it as definitive health advice.
Allergy Information
Please check ingredients for potential allergens and consult a health professional if in doubt.