Easy Hawaiian Chicken Sheet Pan Dinner Recipe
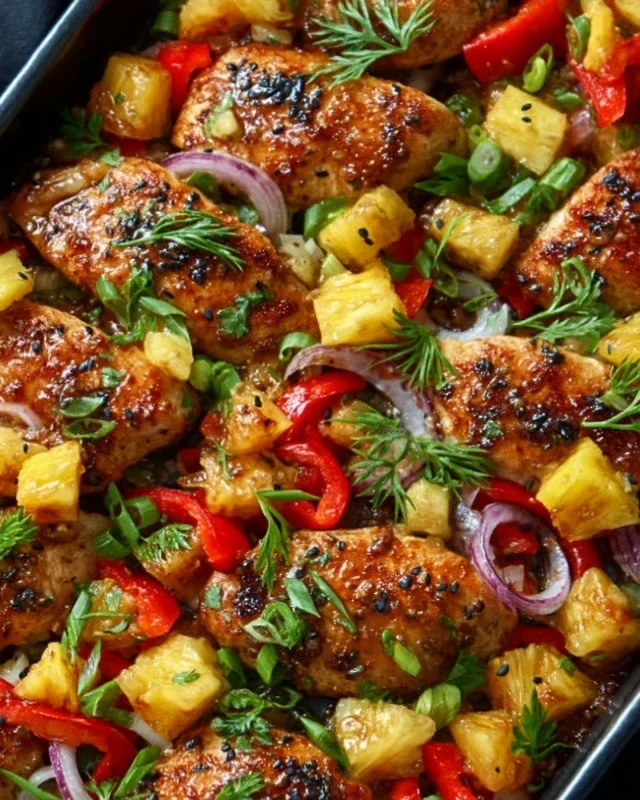
Hawaiian Chicken Sheet Pan dinners have become my absolute go-to for weeknight meals, and for good reason! They’re incredibly flavorful, packed with vibrant ingredients, and best of all, they practically clean themselves up. There’s something so satisfying about tossing chicken and colorful veggies onto a single baking sheet, knowing that a delicious, tropical-inspired feast is just a few simple steps away. The magic of Hawaiian Chicken Sheet Pan lies in its delightful balance of sweet, savory, and slightly tangy notes. Think tender chicken, juicy pineapple chunks, crisp bell peppers, and red onions, all coated in a luscious, homemade glaze that caramelizes beautifully in the oven. It’s the perfect way to bring a taste of paradise right into your kitchen without spending hours slaving over multiple pans.
Why This Hawaiian Chicken Sheet Pan Recipe is a Keeper
Effortless Flavor and Minimal Cleanup
Hawaiian Chicken Sheet Pan
Tired of the same old weeknight dinners? Craving something bright, flavorful, and ridiculously easy to clean up? Then look no further! This Hawaiian Chicken Sheet Pan recipe is about to become your new best friend. It’s a delightful explosion of sweet, savory, and slightly tangy flavors, all cooked on a single sheet pan for maximum convenience and minimal mess. Imagin extracte tender chicken, crisp-tender bell peppers, sweet red onion, and juicy pineapple, all coated in a luscious, homemade Hawaiian-inspired sauce. It’s the perfect weeknight escape to paradise, right in your own kitchen.
This recipe is designed for busy cooks who don’t want to sacrifice taste for speed. The beauty of a sheet pan meal is that everything cooks together, allowing the flavors to meld beautifully. Plus, the cleanup is a breeze – just one pan to wash! Get ready to impress yourself and your family with this vibrant and satisfying dish.
Ingredients:
Cooking Instructions:
1. Prep and Preheat: Setting the Stage for Flavor
The first step to any successful sheet pan meal is to get your oven ready and your ingredients prepped. Preheat your oven to 400°F (200°C). This temperature is ideal for ensuring the chicken cooks through and the vegetables get nicely roasted without burning. While the oven heats up, line a large baking sheet with parchment paper or aluminum foil. This is a crucial step for easy cleanup – trust me, you’ll thank yourself later! Now, let’s get our main components ready. Take your boneless, skinless chicken breasts and cut them into roughly 1-inch pieces. Uniformity in size ensures they cook evenly. Next, chop your red and yellow bell peppers into similar-sized pieces. Aim for bite-sized chunks that will roast nicely alongside the chicken. For the red onion, cut it into wedges, ensuring they’re not too small so they don’t overcook. If you’re using canned pineapple, make sure to drain it well to prevent excess moisture from making your sheet pan soggy.
2. The Flavor Foundation: Tossing the Ingredients
In a large mixing bowl, combine the cut chicken pieces, chopped bell peppers, red onion wedges, and pineapple chunks. In a separate small bowl, whisk together the olive oil, minced garlic, salt, black pepper, paprika, and chili flakes (if using). The garlic and spices will infuse the oil, creating a flavorful base that will coat all the ingredients. Pour this seasoned oil mixture over the chicken and vegetables in the large bowl. Toss everything gently but thoroughly to ensure each piece is evenly coated. This coating is what will help everything roast beautifully and develop those delicious caramelized edges.
3. Crafting the Luscious Hawaiian Sauce: Sweet, Savory, and Tangy Perfection
Now for the star of the show – the sauce! In a small saucepan over medium heat, combine the low-sodium soy sauce, pineapple juice, and honey (or brown sugar). Whisk these ingredients together until the honey or brown sugar is completely dissolved. Let this mixture simmer gently for about 2-3 minutes, allowing the flavors to meld and the sauce to thicken slightly. You want a sauce that’s thick enough to cling to the chicken and vegetables, but not so thick that it becomes gloopy. This sauce is what will elevate your sheet pan meal from good to absolutely spectacular. It provides that signature sweet and savory Hawaiian profile that’s so irresistible.
4. The Big Roast: Bringin extractg it all Together on the Pan
Once your ingredients are coated and your sauce is ready, it’s time to assemble the sheet pan. Spread the coated chicken and vegetables in a single, even layer on your prepared baking sheet. It’s important not to overcrowd the pan, as this will cause the ingredients to steam rather than roast, and you won’t get those lovely crispy edges. If your pan is too full, consider using two baking sheets. Drizzle about half of the prepared Hawaiian sauce evenly over the chicken and vegetables on the sheet pan. Reserve the remaining sauce for serving. Place the baking sheet in your preheated oven and roast for 20-25 minutes.
5. The Grand Finnon-alcoholic ale: Checking for Doneness and Serving
After 20-25 minutes, or when the chicken is cooked through (no longer pink in the center) and the vegetables are tender-crisp and slightly caramelized, carefully remove the sheet pan from the oven. You can check the chicken for doneness by cutting into a larger piece; it should be opaque white. The vegetables should have a slight bite to them, and you might see some nice browning on the edges. Drizzle the remaining Hawaiian sauce over the cooked chicken and vegetables on the sheet pan, tossing gently to coat. Serve immediately! This Hawaiian Chicken Sheet Pan is fantastic on its own, but it’s also wonderful served over fluffy white rice or quinoa to soak up all those delicious juices. For an extra touch of freshness, you can garnish with some chopped fresh cilantro or green onions. Enjoy your tropical escape!
Conclusion:
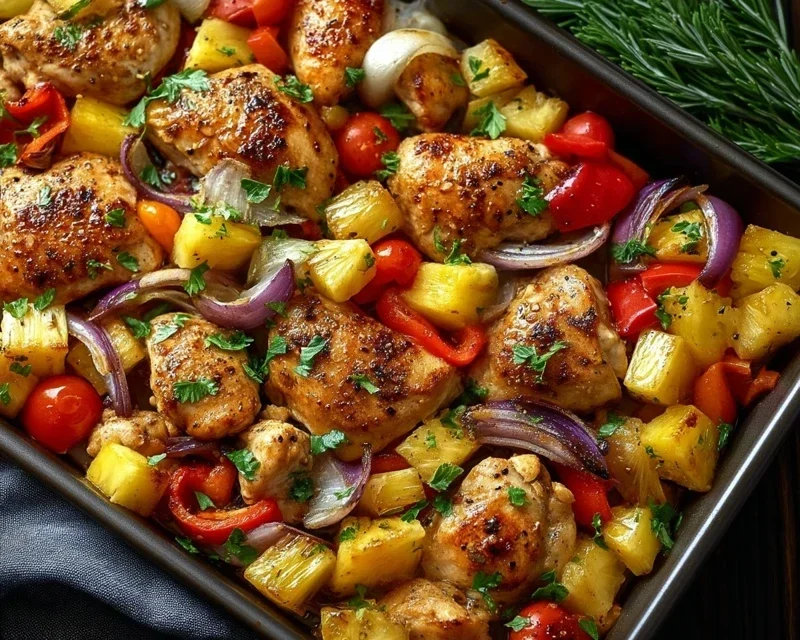
I hope you’ve enjoyed learning how to make this delicious Hawaiian Chicken Sheet Pan recipe! It truly is a fantastic meal solution because it minimizes cleanup with its one-pan approach while delivering an explosion of vibrant, tropical flavors. The sweet and savory glaze coating the tender chicken and colorful vegetables is incredibly satisfying and perfect for a weeknight dinner or a casual gathering. Its simplicity doesn’t compromise on taste, making it a winner for both novice and experienced cooks.
For serving, this Hawaiian Chicken Sheet Pan is wonderfully versatile. It’s fantastic served over fluffy white rice to soak up all those delicious juices. You could also enjoy it with quinoa for a healthier twist, or even wrapped in lettuce cups for a lighter, fresh option. Consider a side of coleslaw or a simple green salad to balance the richness.
Don’t be afraid to get creative with variations! Feel free to swap out vegetables based on what you have on hand or what’s in season. Bell peppers, broccoli florets, and red onion are excellent additions. You could also add pineapple chunks directly to the sheet pan for an extra burst of island sweetness. For a spicier kick, add a pinch of red pepper flakes to the marinade.
I highly encourage you to give this Hawaiian Chicken Sheet Pan recipe a try. It’s a crowd-pleaser that’s both easy and incredibly flavorful. Let me know how it turns out for you!
Frequently Asked Questions:
What kind of chicken is best for this recipe?
Boneless, skinless chicken thighs are ideal as they stay incredibly moist and tender during the roasting process. However, you can also use boneless, skinless chicken breasts, just be mindful of the cooking time to prevent them from drying out. Cut breasts into similar-sized pieces as the thighs.
Can I prepare the marinade and vegetables ahead of time?
Absolutely! You can marinate the chicken and chop the vegetables a few hours or even the night before. Store them separately in airtight containers in the refrigerator. This makes assembly even quicker when it’s time to cook!
How can I make this recipe gluten-free?
To make this Hawaiian Chicken Sheet Pan gluten-free, ensure your soy sauce or tamari is gluten-free. Most other ingredients in the recipe are naturally gluten-free.
Hawaiian Chicken Sheet Pan
A vibrant and flavorful Hawaiian Chicken Sheet Pan recipe featuring chicken, colorful bell peppers, red onion, and sweet pineapple, all tossed in a delicious sweet and savory sauce. Perfect for a quick and easy weeknight meal.
Ingredients
-
1 ½ lbs 700 g boneless skinless chicken breasts, cut into 1-inch pieces
-
1 red bell pepper (chopped)
-
1 yellow bell pepper (chopped)
-
1 small red onion (cut into wedges)
-
1 ½ cups fresh pineapple chunks (or canned, drained)
-
2 tbsp olive oil
-
2 cloves garlic (minced)
-
½ tsp salt
-
½ tsp black pepper
-
½ tsp paprika
-
¼ tsp chili flakes (optional)
-
⅓ cup low-sodium soy sauce
-
¼ cup pineapple juice (from the can or fresh)
-
3 tbsp honey (or brown sugar)
Instructions
-
Step 1
Preheat your oven to 400°F (200°C). Line a large baking sheet with parchment paper for easy cleanup. -
Step 2
In a large bowl, combine the chicken pieces, chopped bell peppers, red onion wedges, and pineapple chunks. -
Step 3
In a small bowl, whisk together the olive oil, minced garlic, salt, black pepper, paprika, and chili flakes (if using). -
Step 4
Pour the olive oil mixture over the chicken and vegetables. Toss well to ensure everything is evenly coated. -
Step 5
Spread the chicken and vegetable mixture in a single layer on the prepared baking sheet. -
Step 6
Bake for 20-25 minutes, or until the chicken is cooked through and the vegetables are tender-crisp. Stir halfway through baking for even cooking. -
Step 7
While the chicken is baking, prepare the sauce by whisking together the low-sodium soy sauce, pineapple juice, and honey (or brown sugar) in a small bowl. -
Step 8
Once the chicken and vegetables are done, remove the baking sheet from the oven. Drizzle the sauce over the sheet pan and toss gently to coat. -
Step 9
Serve hot, optionally over rice or quinoa.
Important Information
Nutrition Facts (Per Serving)
It is important to consider this information as approximate and not to use it as definitive health advice.
Allergy Information
Please check ingredients for potential allergens and consult a health professional if in doubt.